Solar eclipses are stunning celestial events that can be photographed creatively through a series of visual effects. One such composition involves combining multiple images of the various stages of the eclipse into a single frame. Follow this guide to create your own compelling view of the solar eclipse.
How to take photos of the solar eclipse
If you've followed our guide on how to photograph a solar eclipse, you may have taken a series of images using your camera and lens combination. Then, in both Adobe Photoshop and Lightroom, you can locate the time of each stage of the eclipse and build your images using a series of layers and blending modes.
How to find the time on an image
Follow these steps to find the times on the images you'd like to incorporate into your solar eclipse photo.
1. Load your images. Begin by loading your images into a photo library, such as Adobe Lightroom. This is where you will apply basic photo adjustments and locate the times of the images. Such image "metadata" will help you identify the time of each stage of the eclipse.
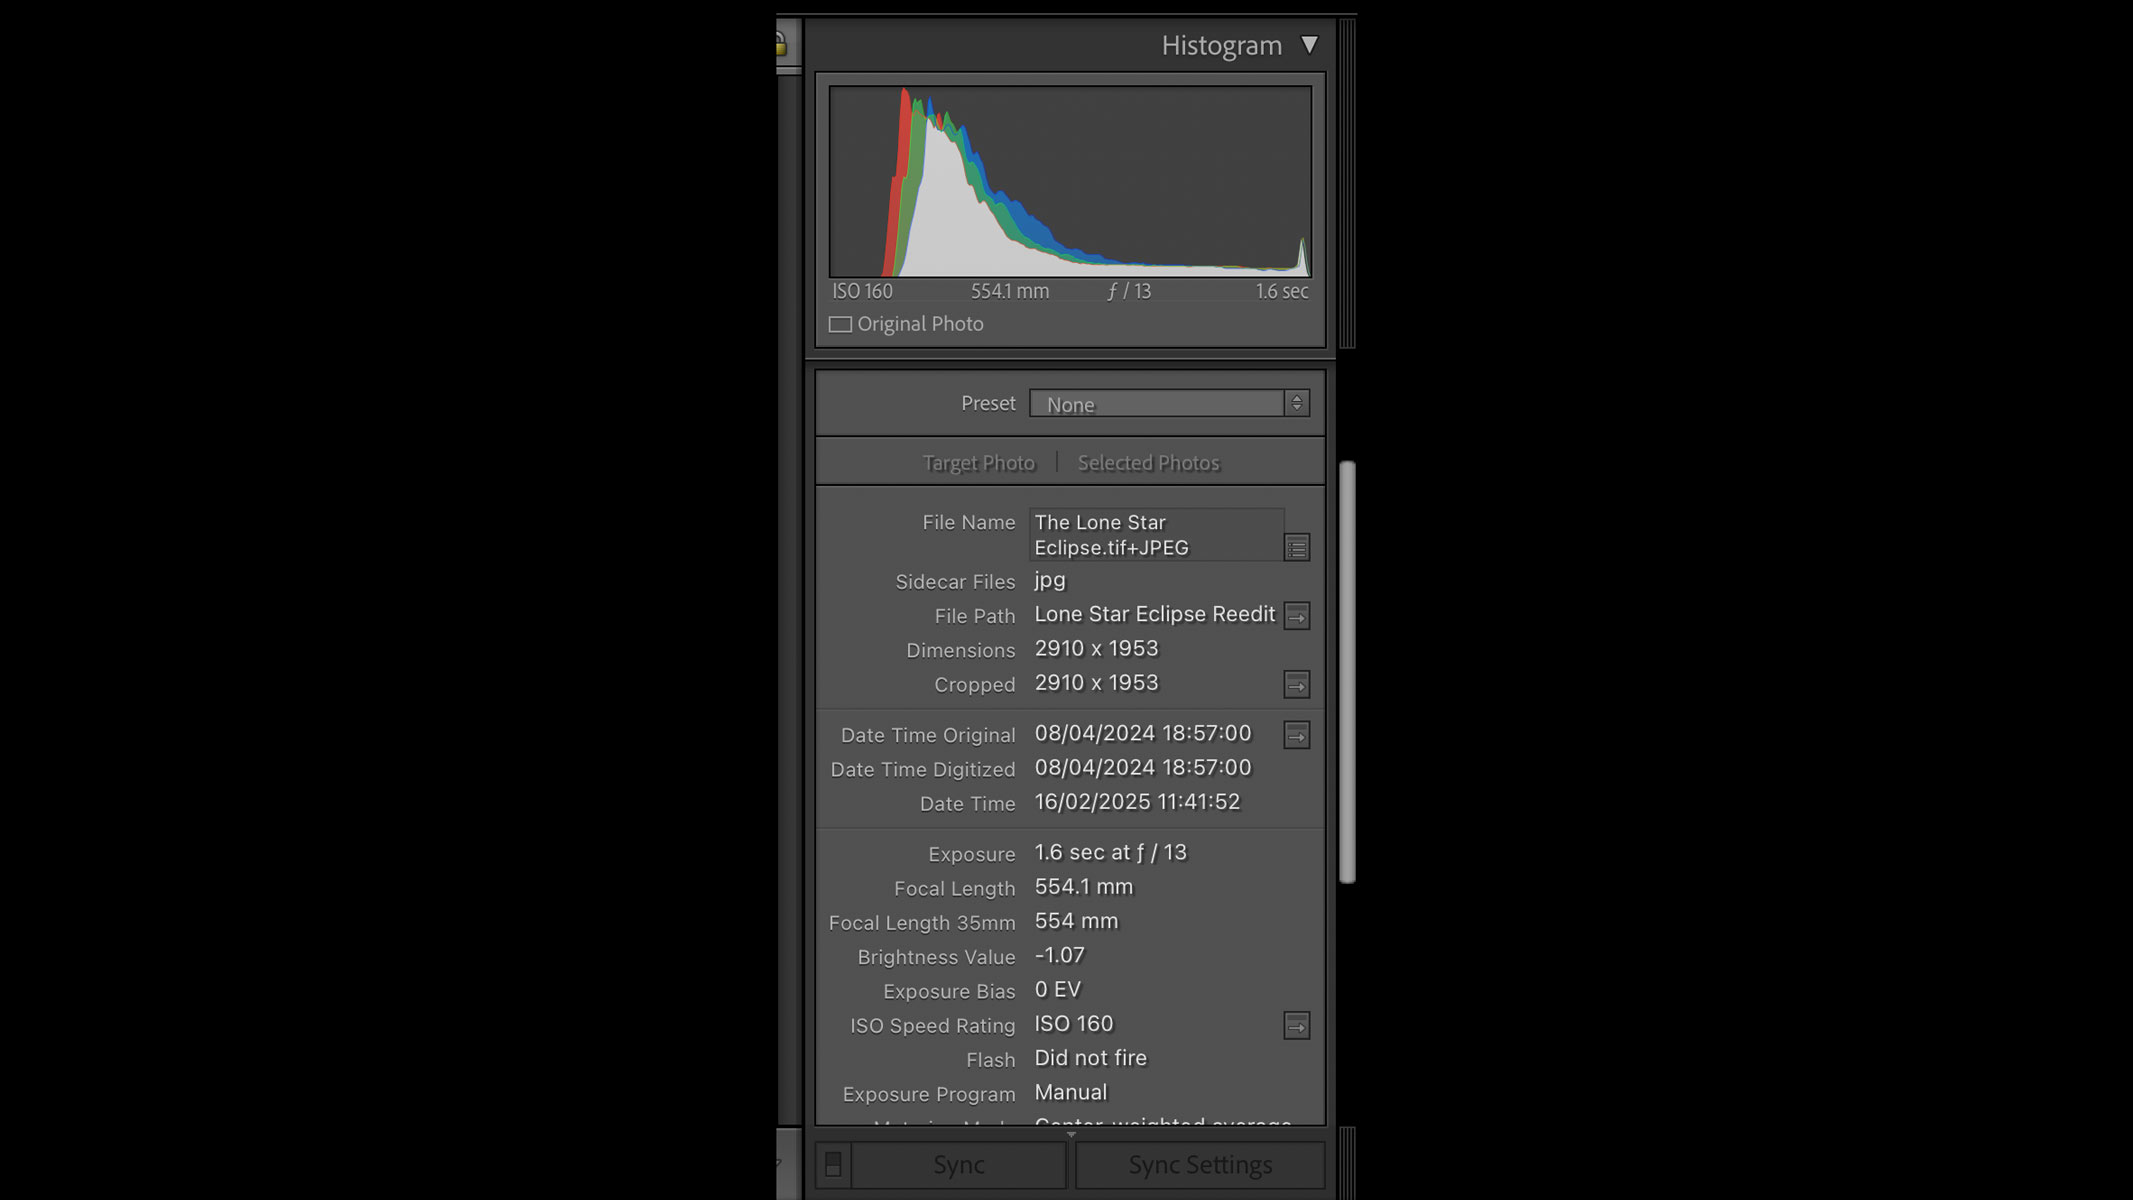
2. Choose how many sub-images you want to use. Next, decide how many "subs" will be integrated into your final composition. You can plan these timings from your imaging location using an app like SkySafari 7 Pro so you can select photos with the same timestamp as each eclipse stage. If the weather obscures some of your images around these times, the nearest frame will be more than adequate.
How to edit solar eclipse photos
When you're reviewing your images, you may need to apply a few minor adjustments to result in a cleaner blend between multiple images. The first adjustment may be to correct the overall exposure of the image. Before I took photographs of the solar eclipse, I had noted to capture an image off-peak to the right.
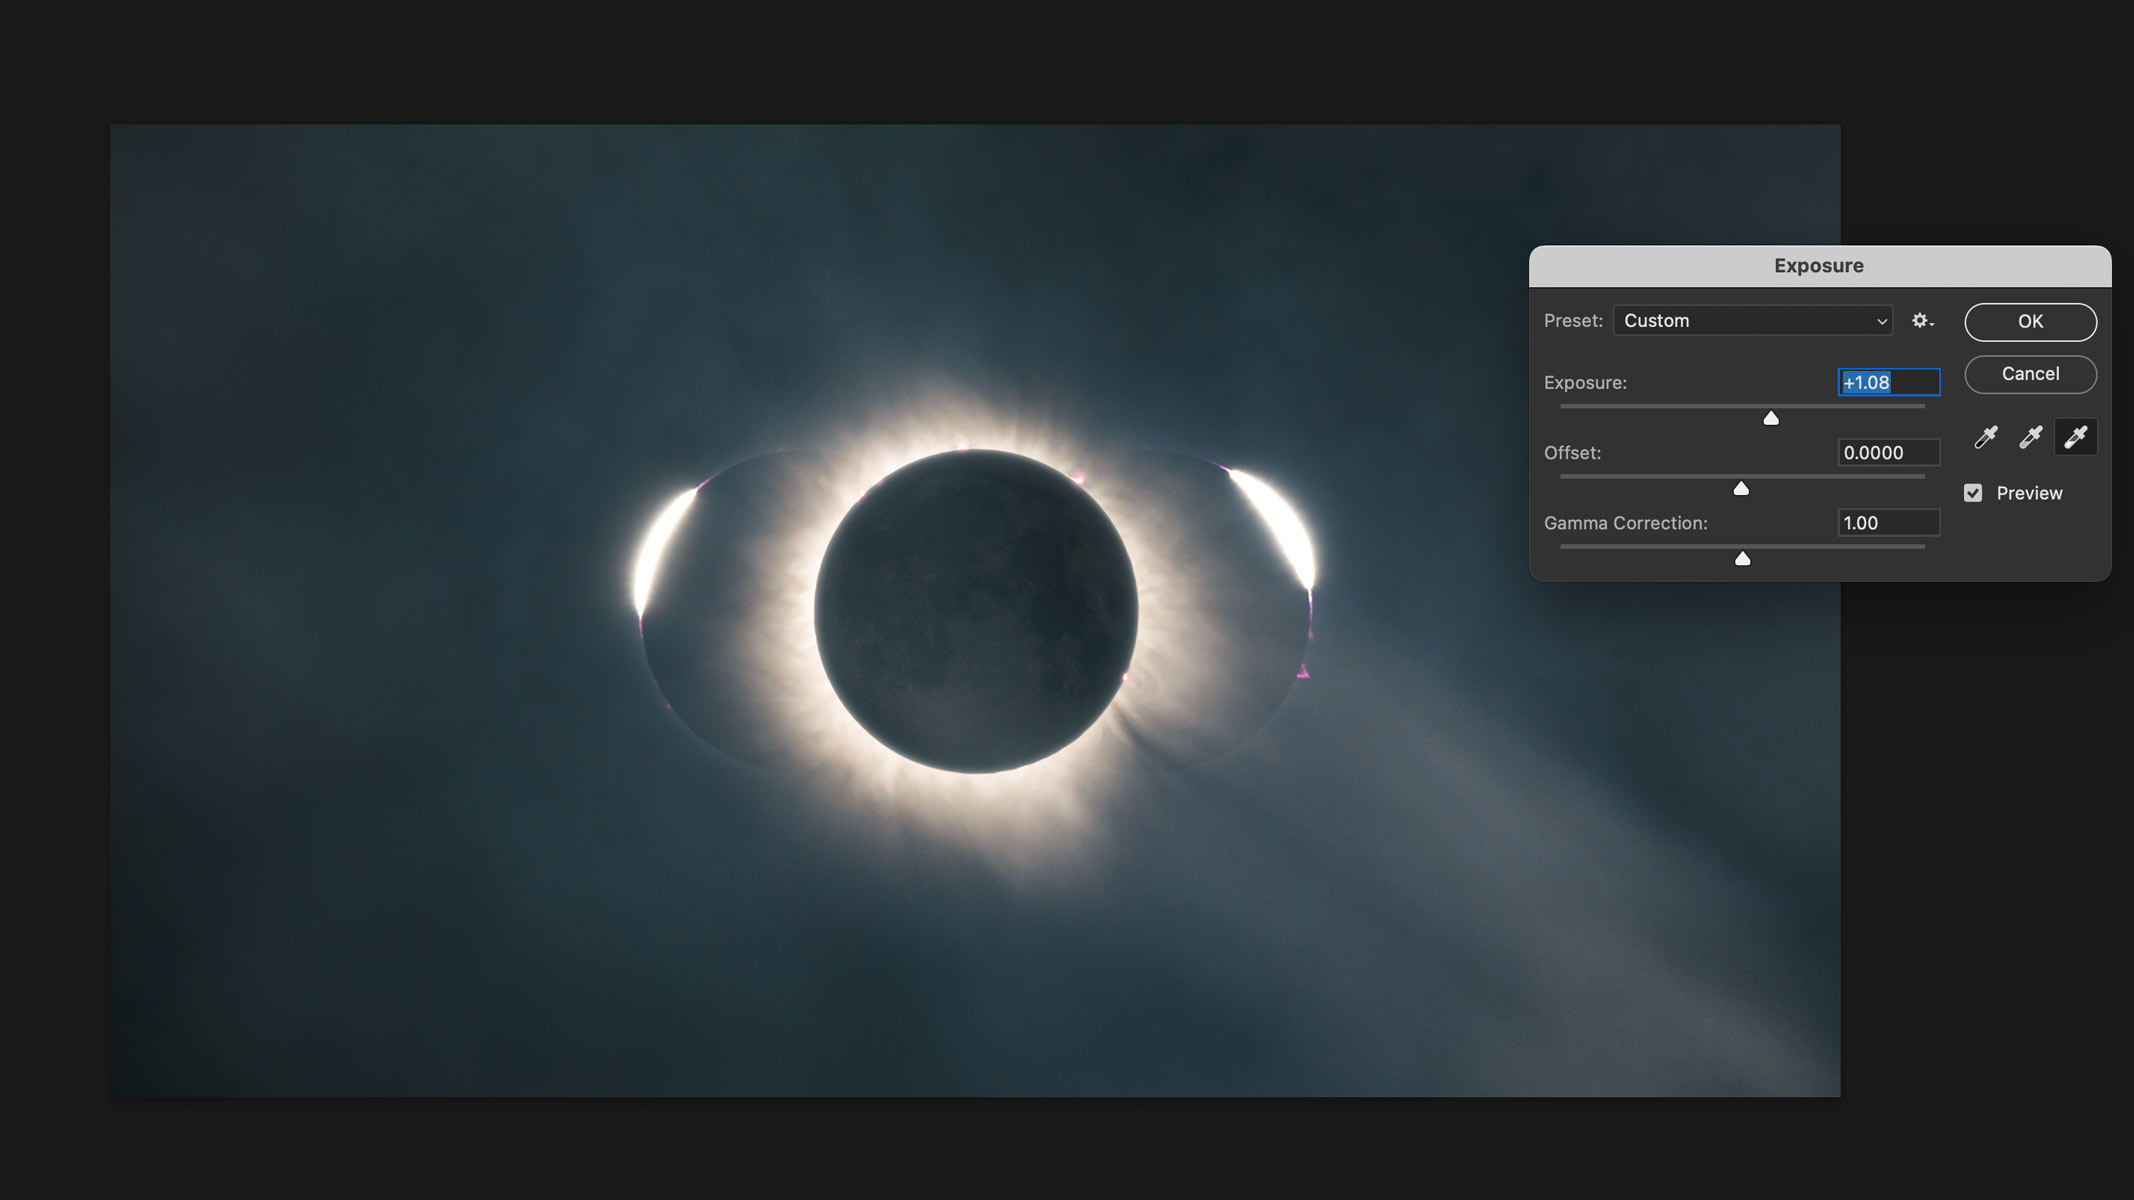
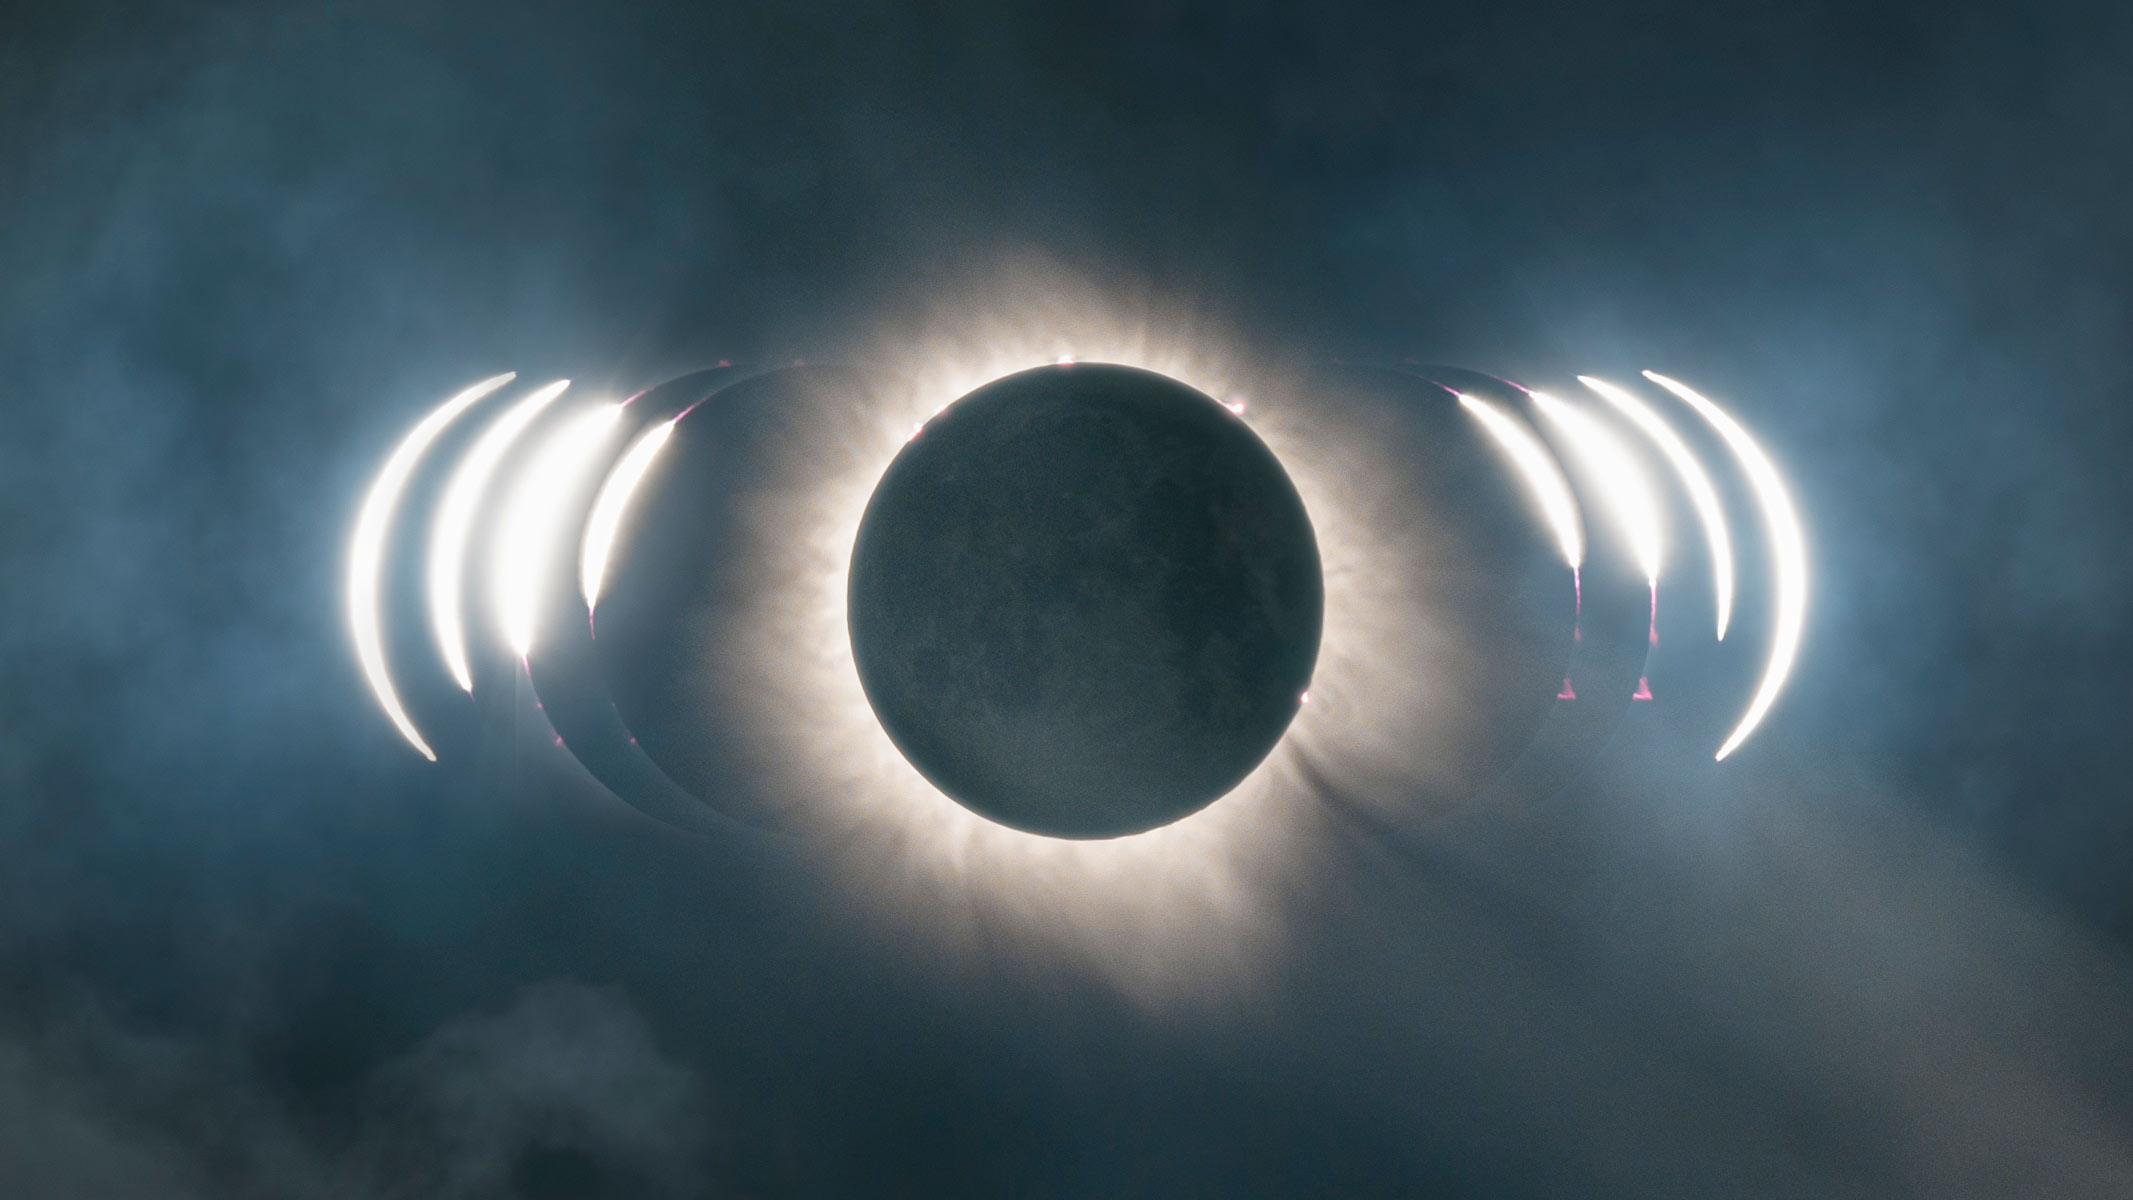
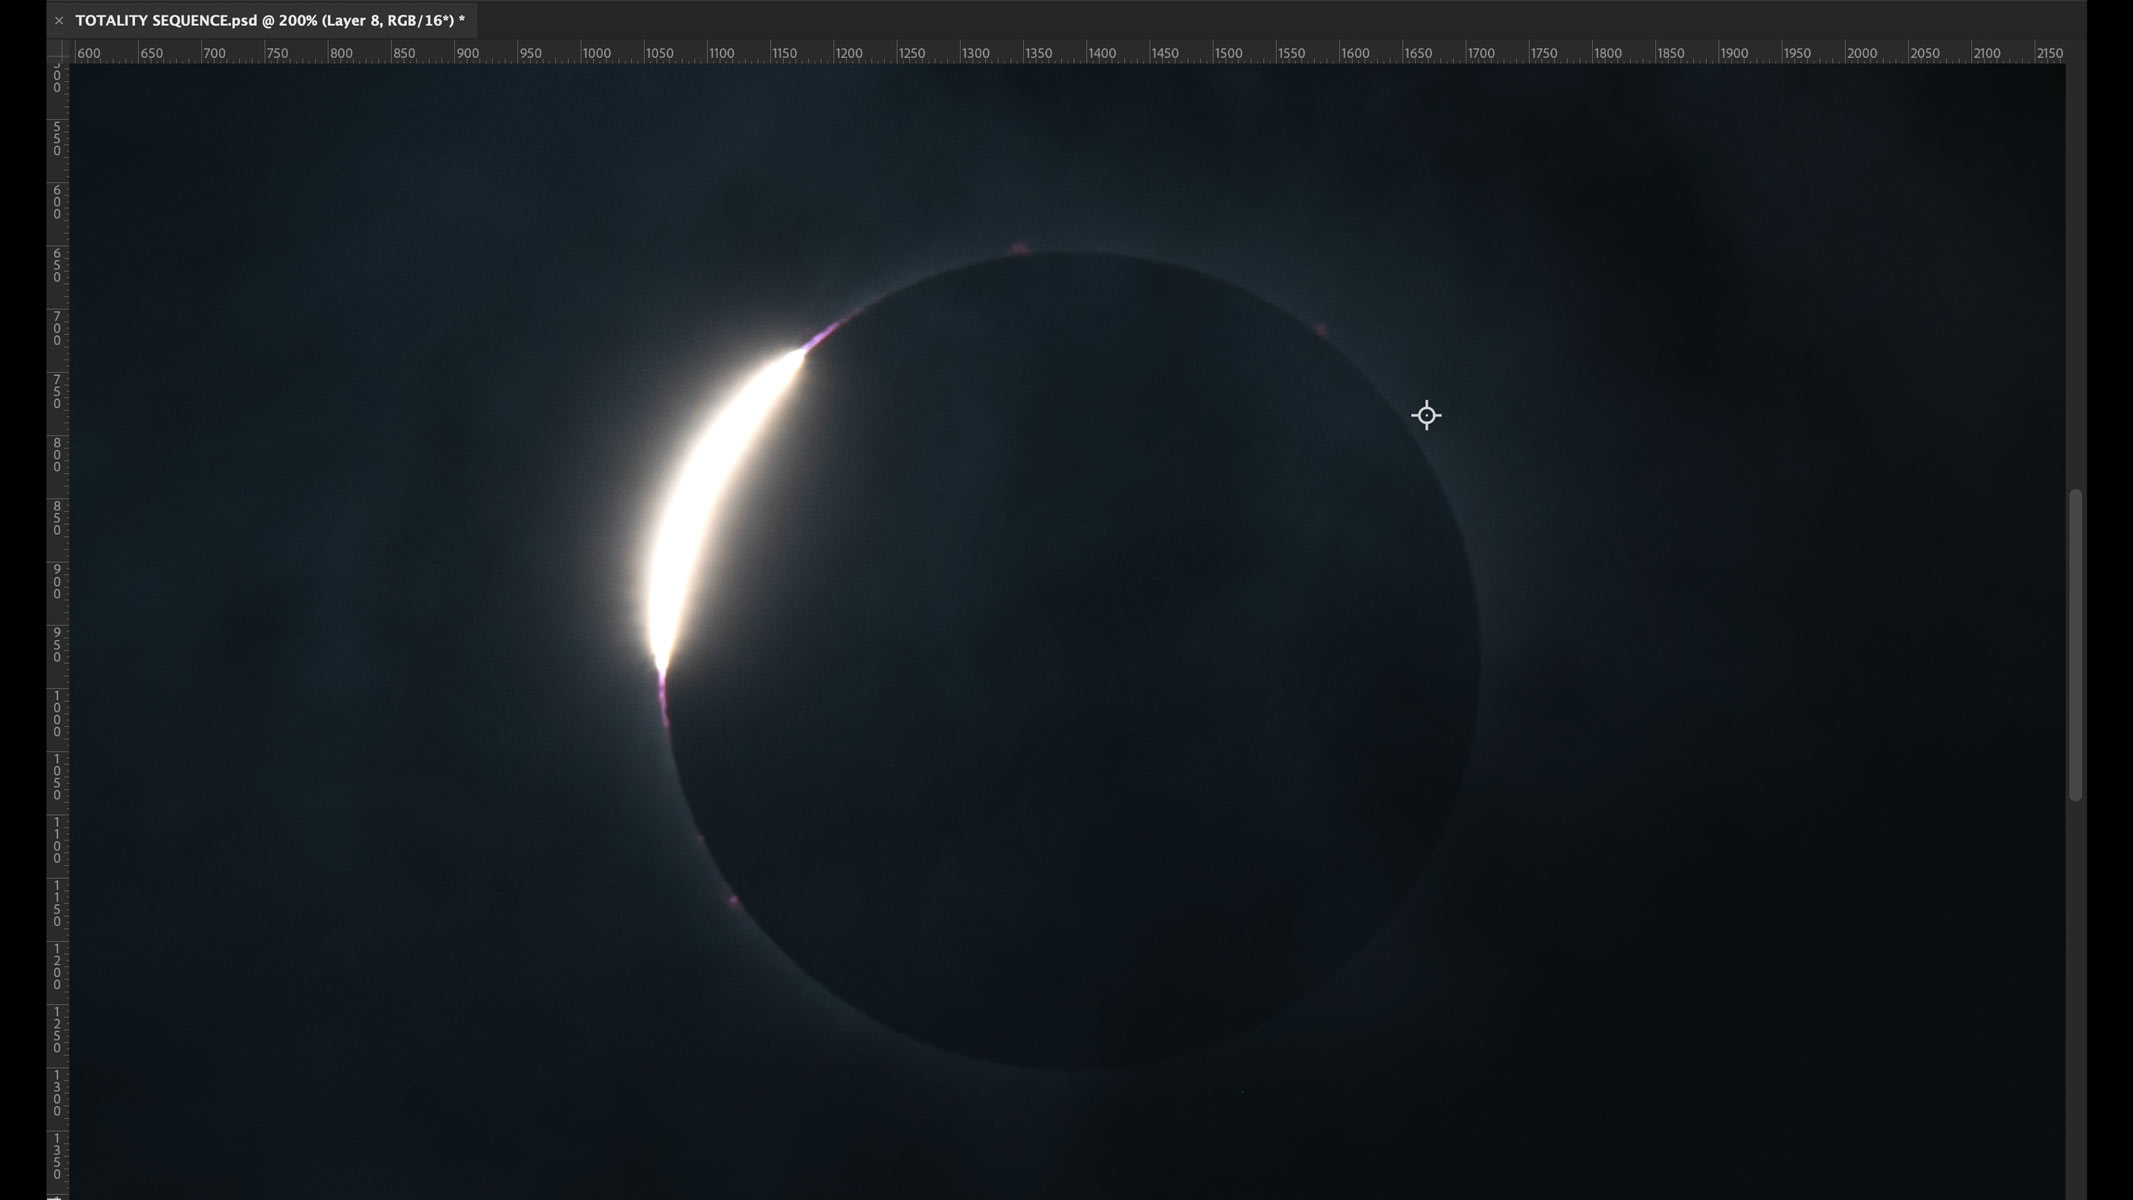
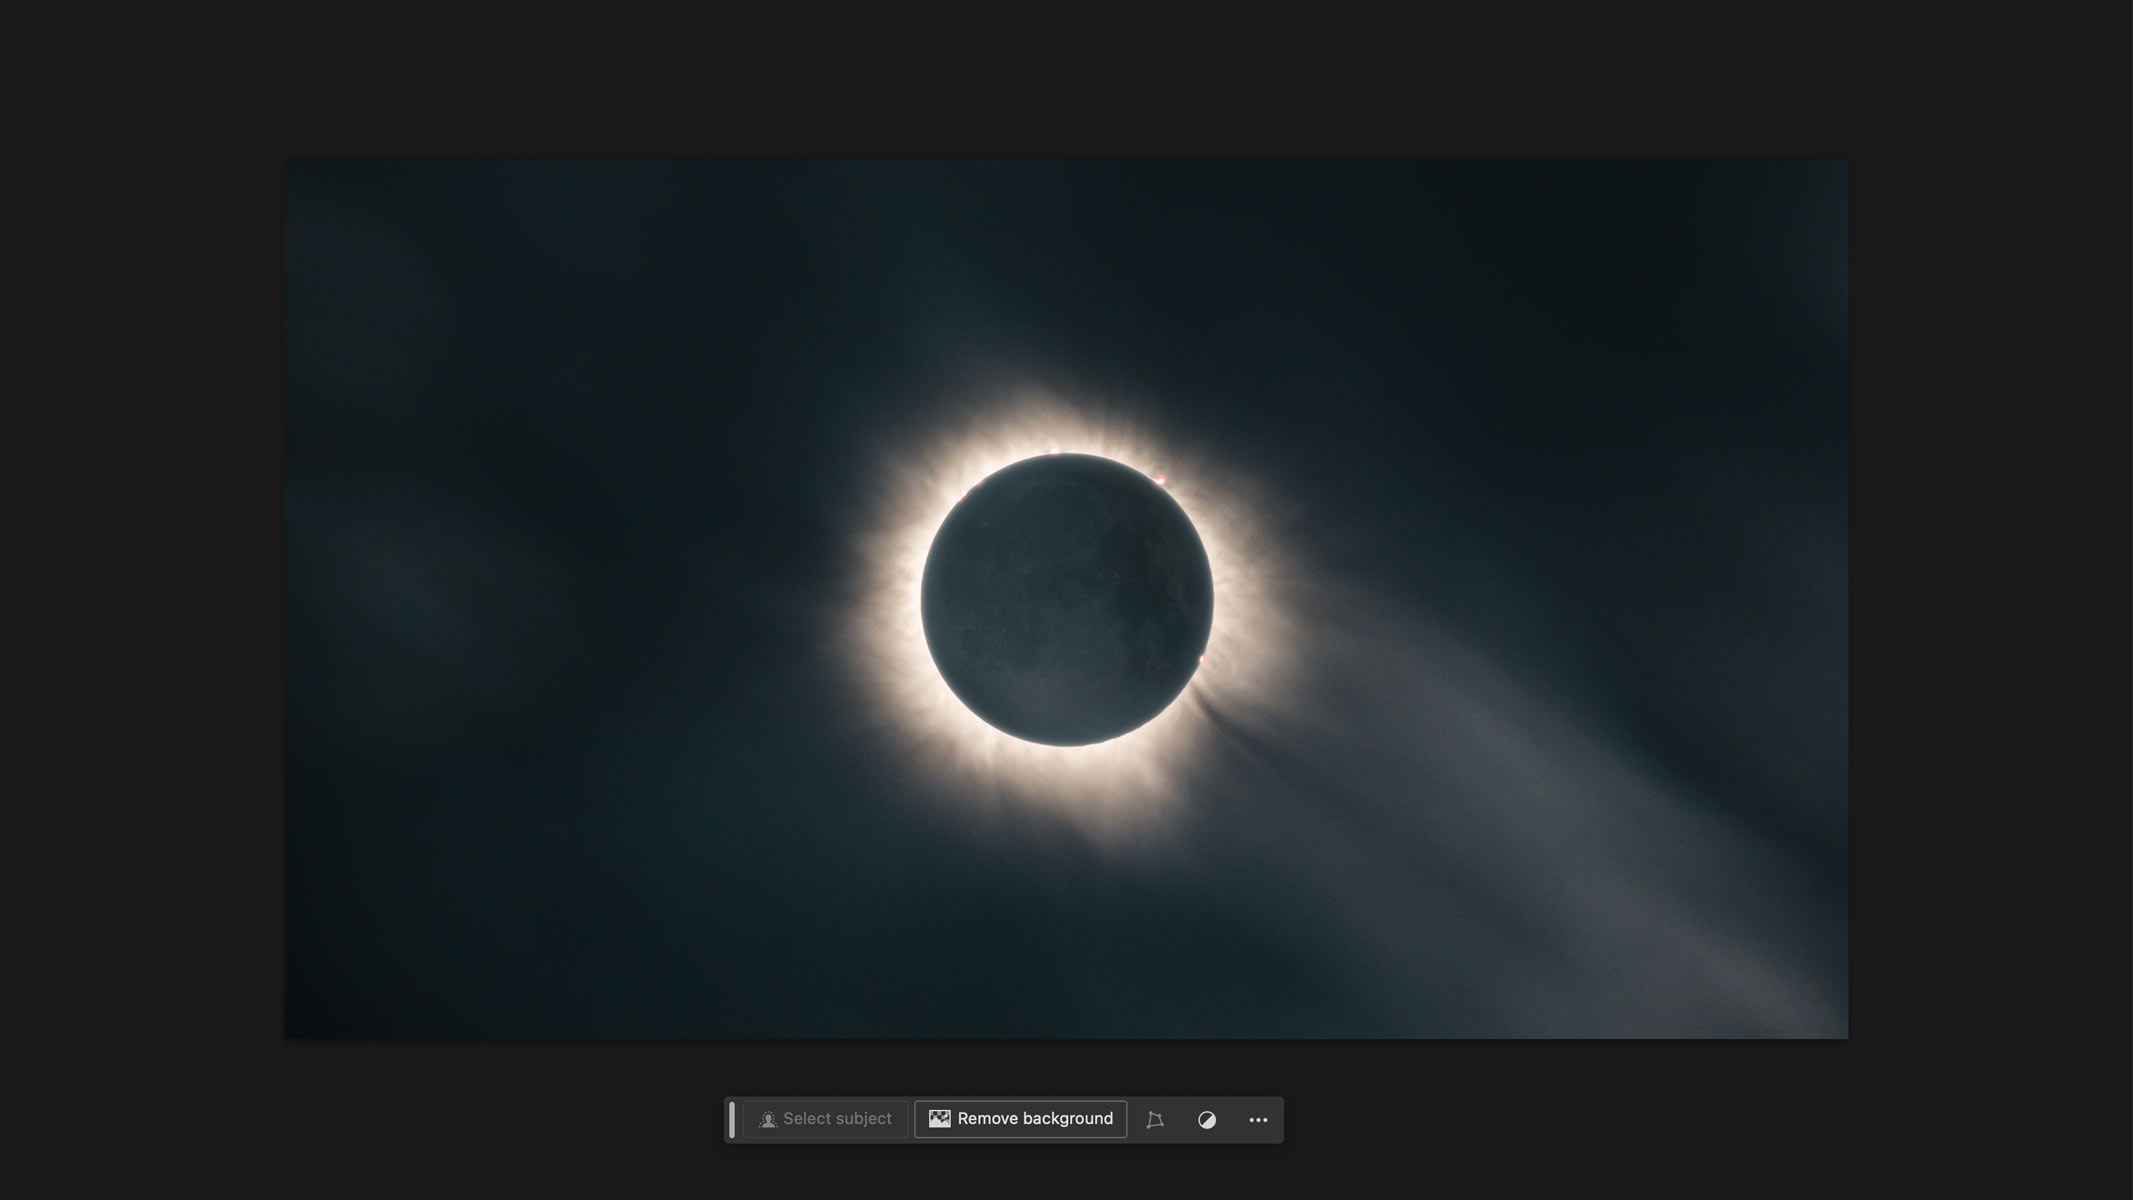
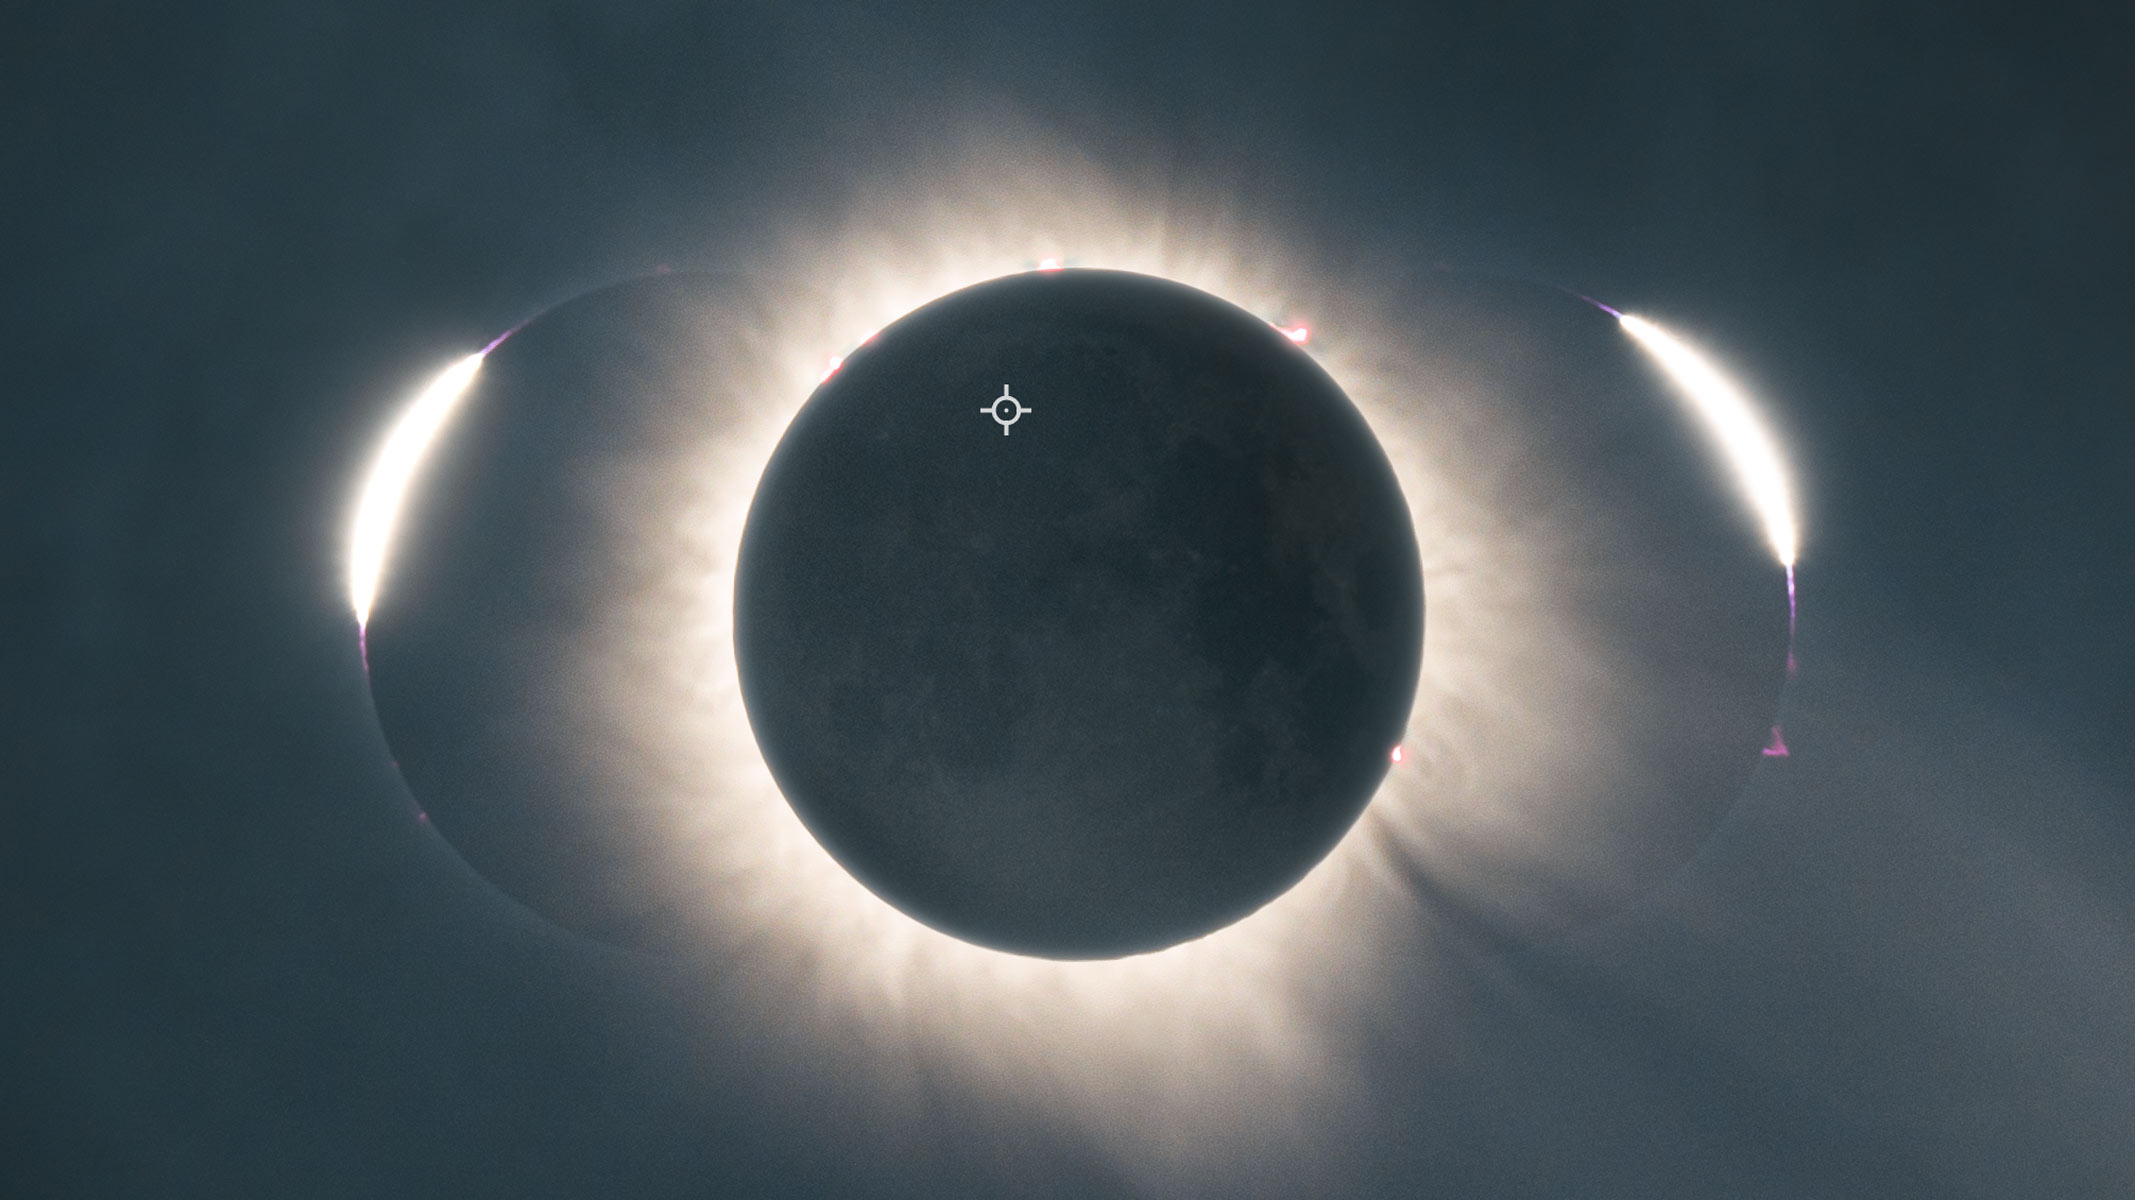
A quality image of the solar disk is one that is in focus, with crisp, defined edges and any sunspots and solar granulation visible. Applying a minor exposure adjustment will naturally boost the contrast between darker and lighter tones of your image, and a good result will be one where the solar disk does not appear under- or overexposed.
Keep an eye on the histogram levels of the image to aid your judgment. If highlights peak, pull back, and vice versa for shadows and darker tones
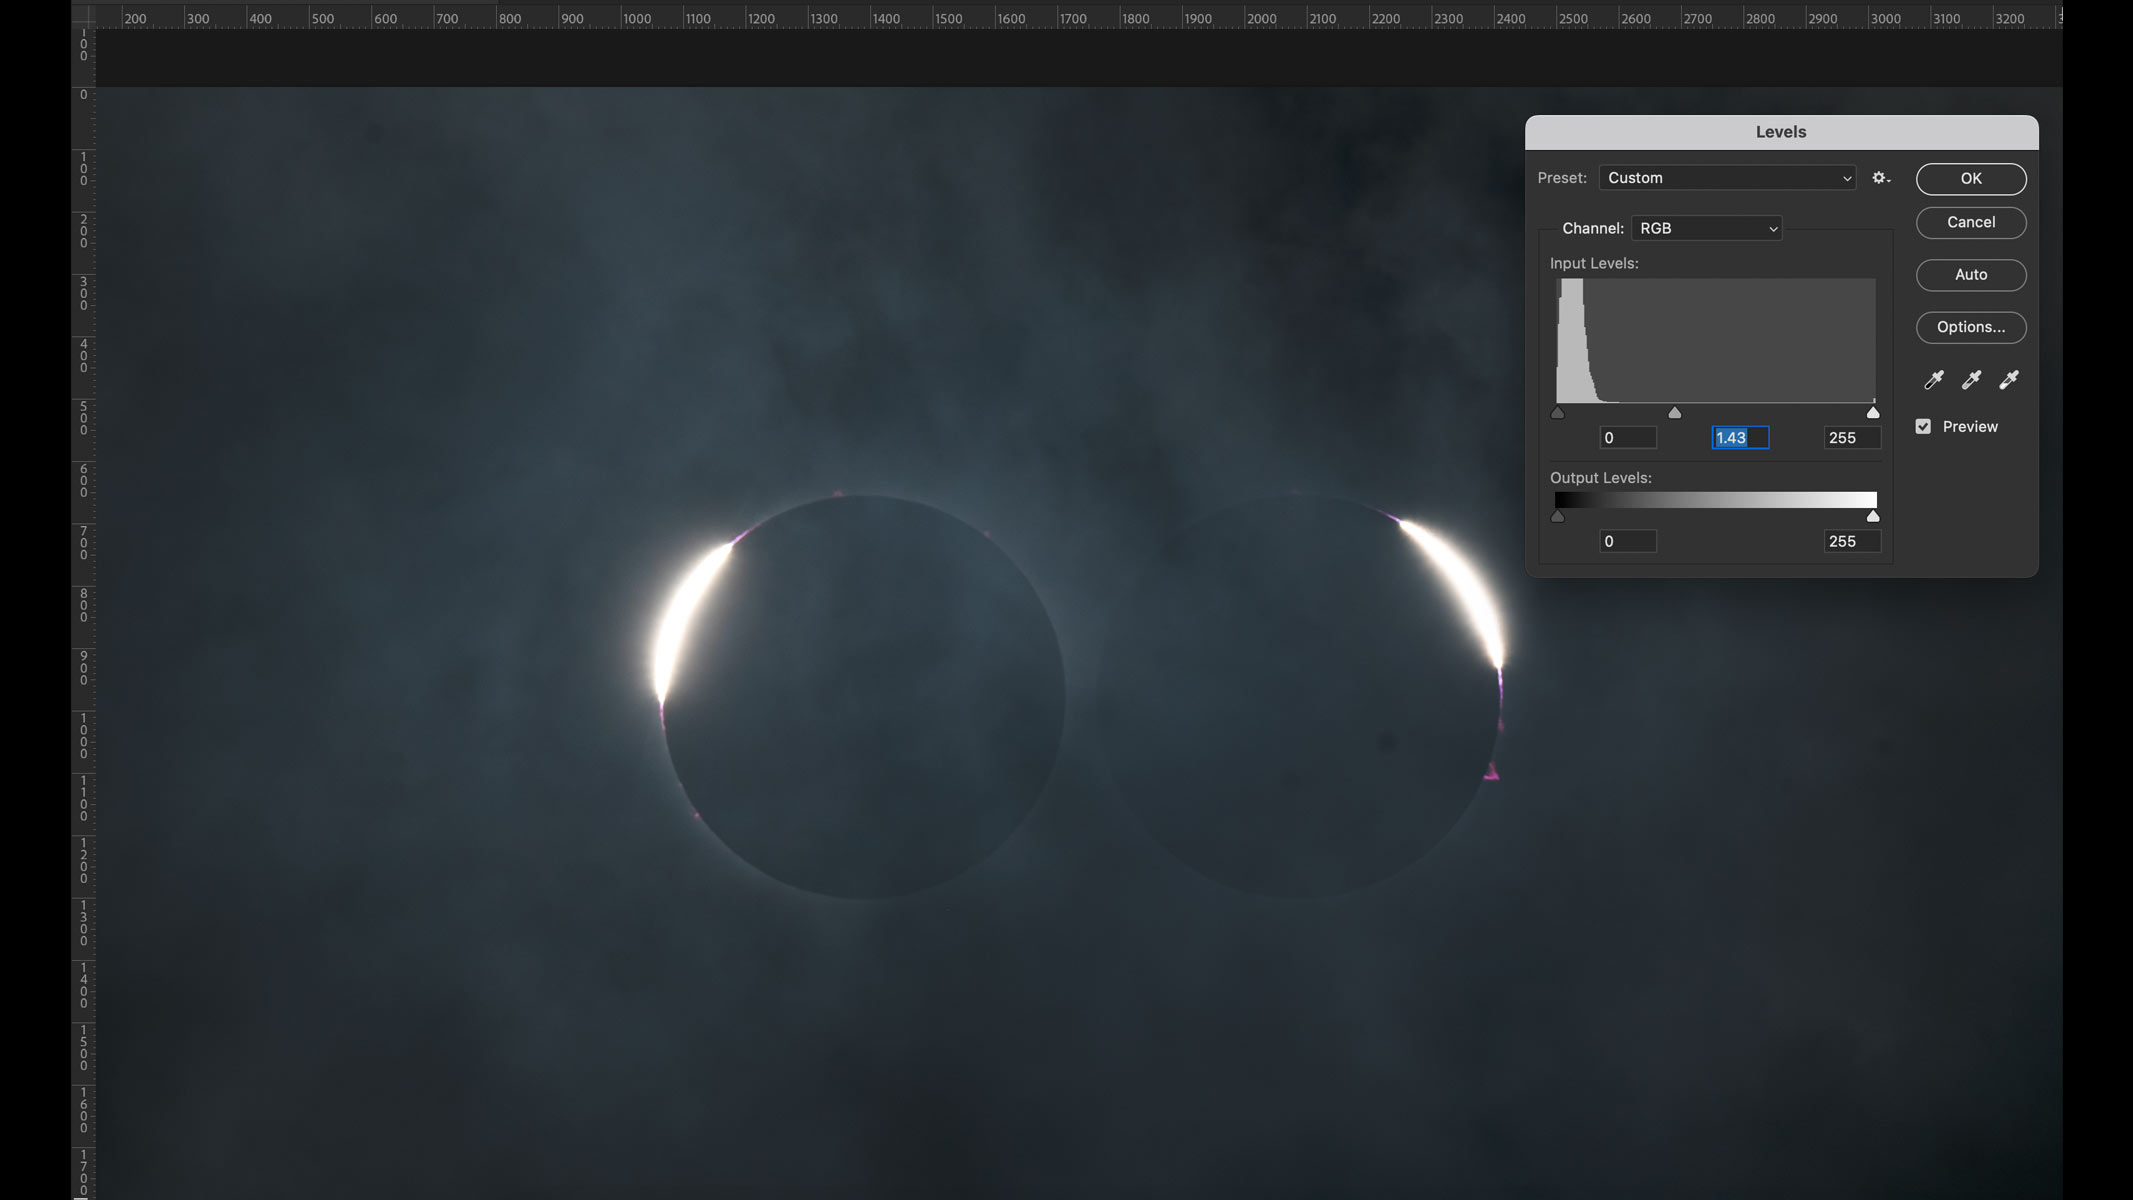
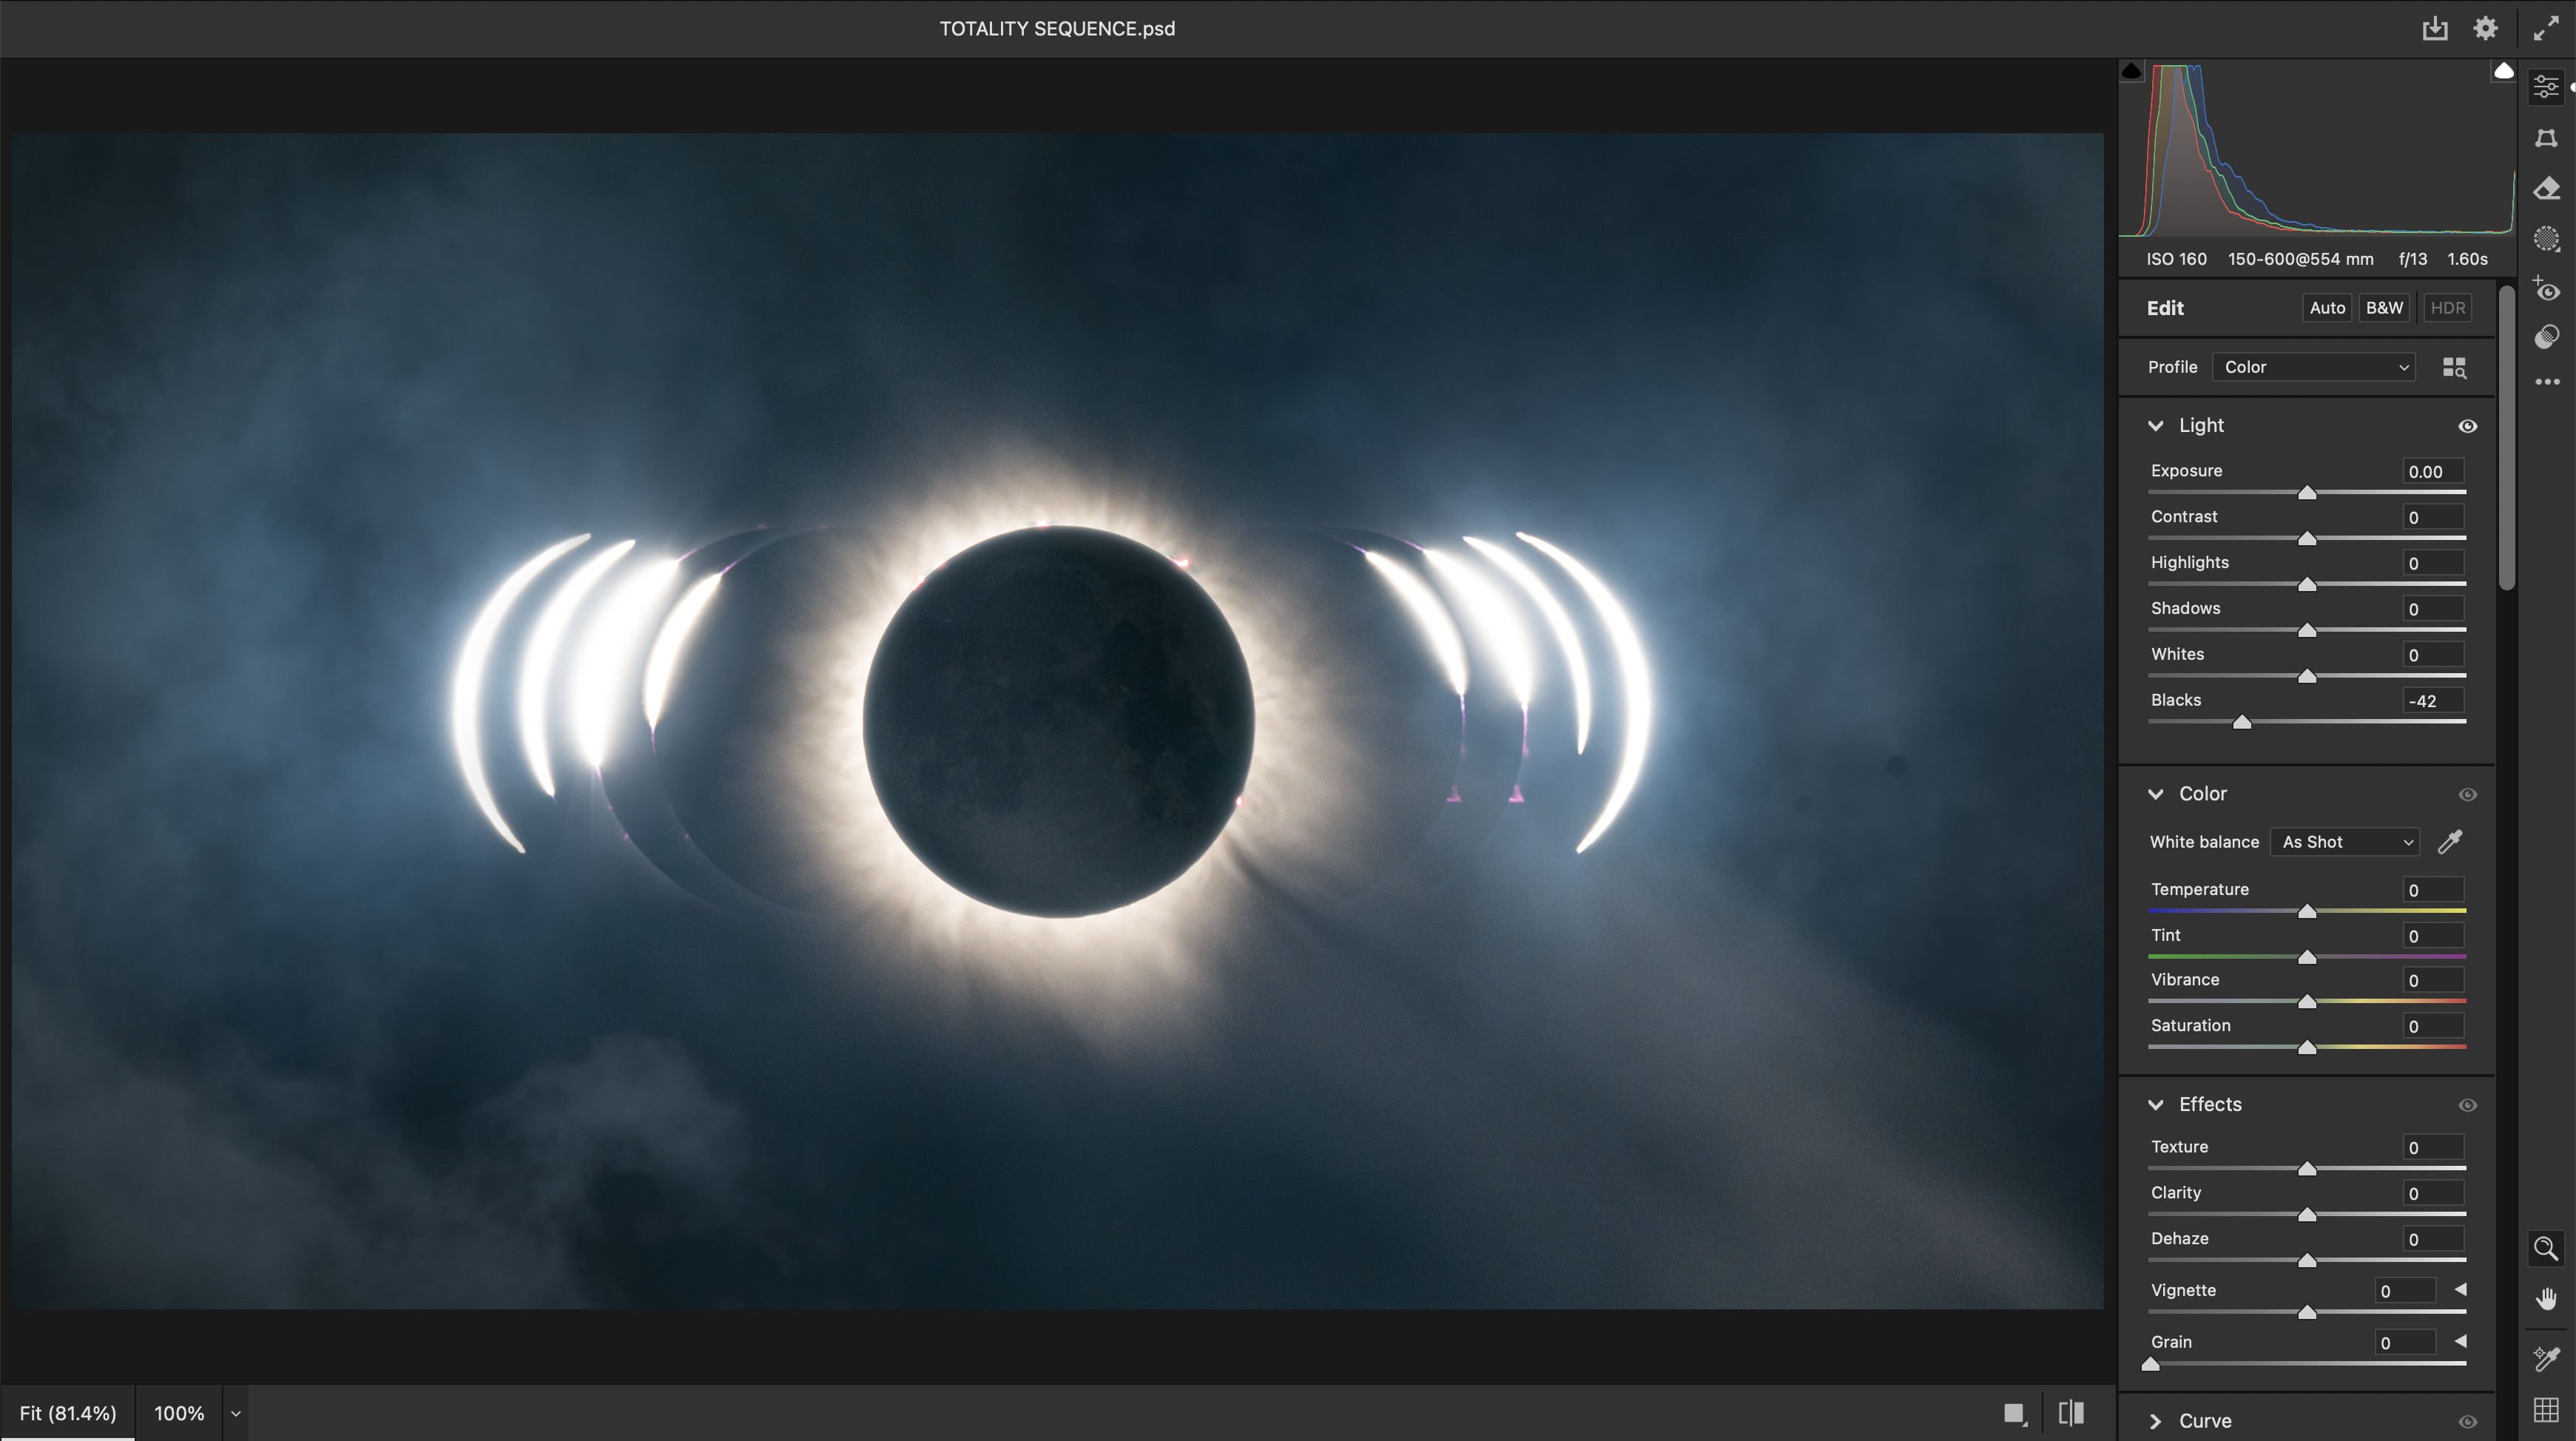
Next, you can "crush" the blacks, where you darken the darkest parts of the image, in this case the moon and the area around the eclipse. This will not only apply more contrast to the overall image but also minimize any image artifacts in the background image data. Apply a very minor adjustment, without clipping data of the solar disk, to create the look and feel you desire.
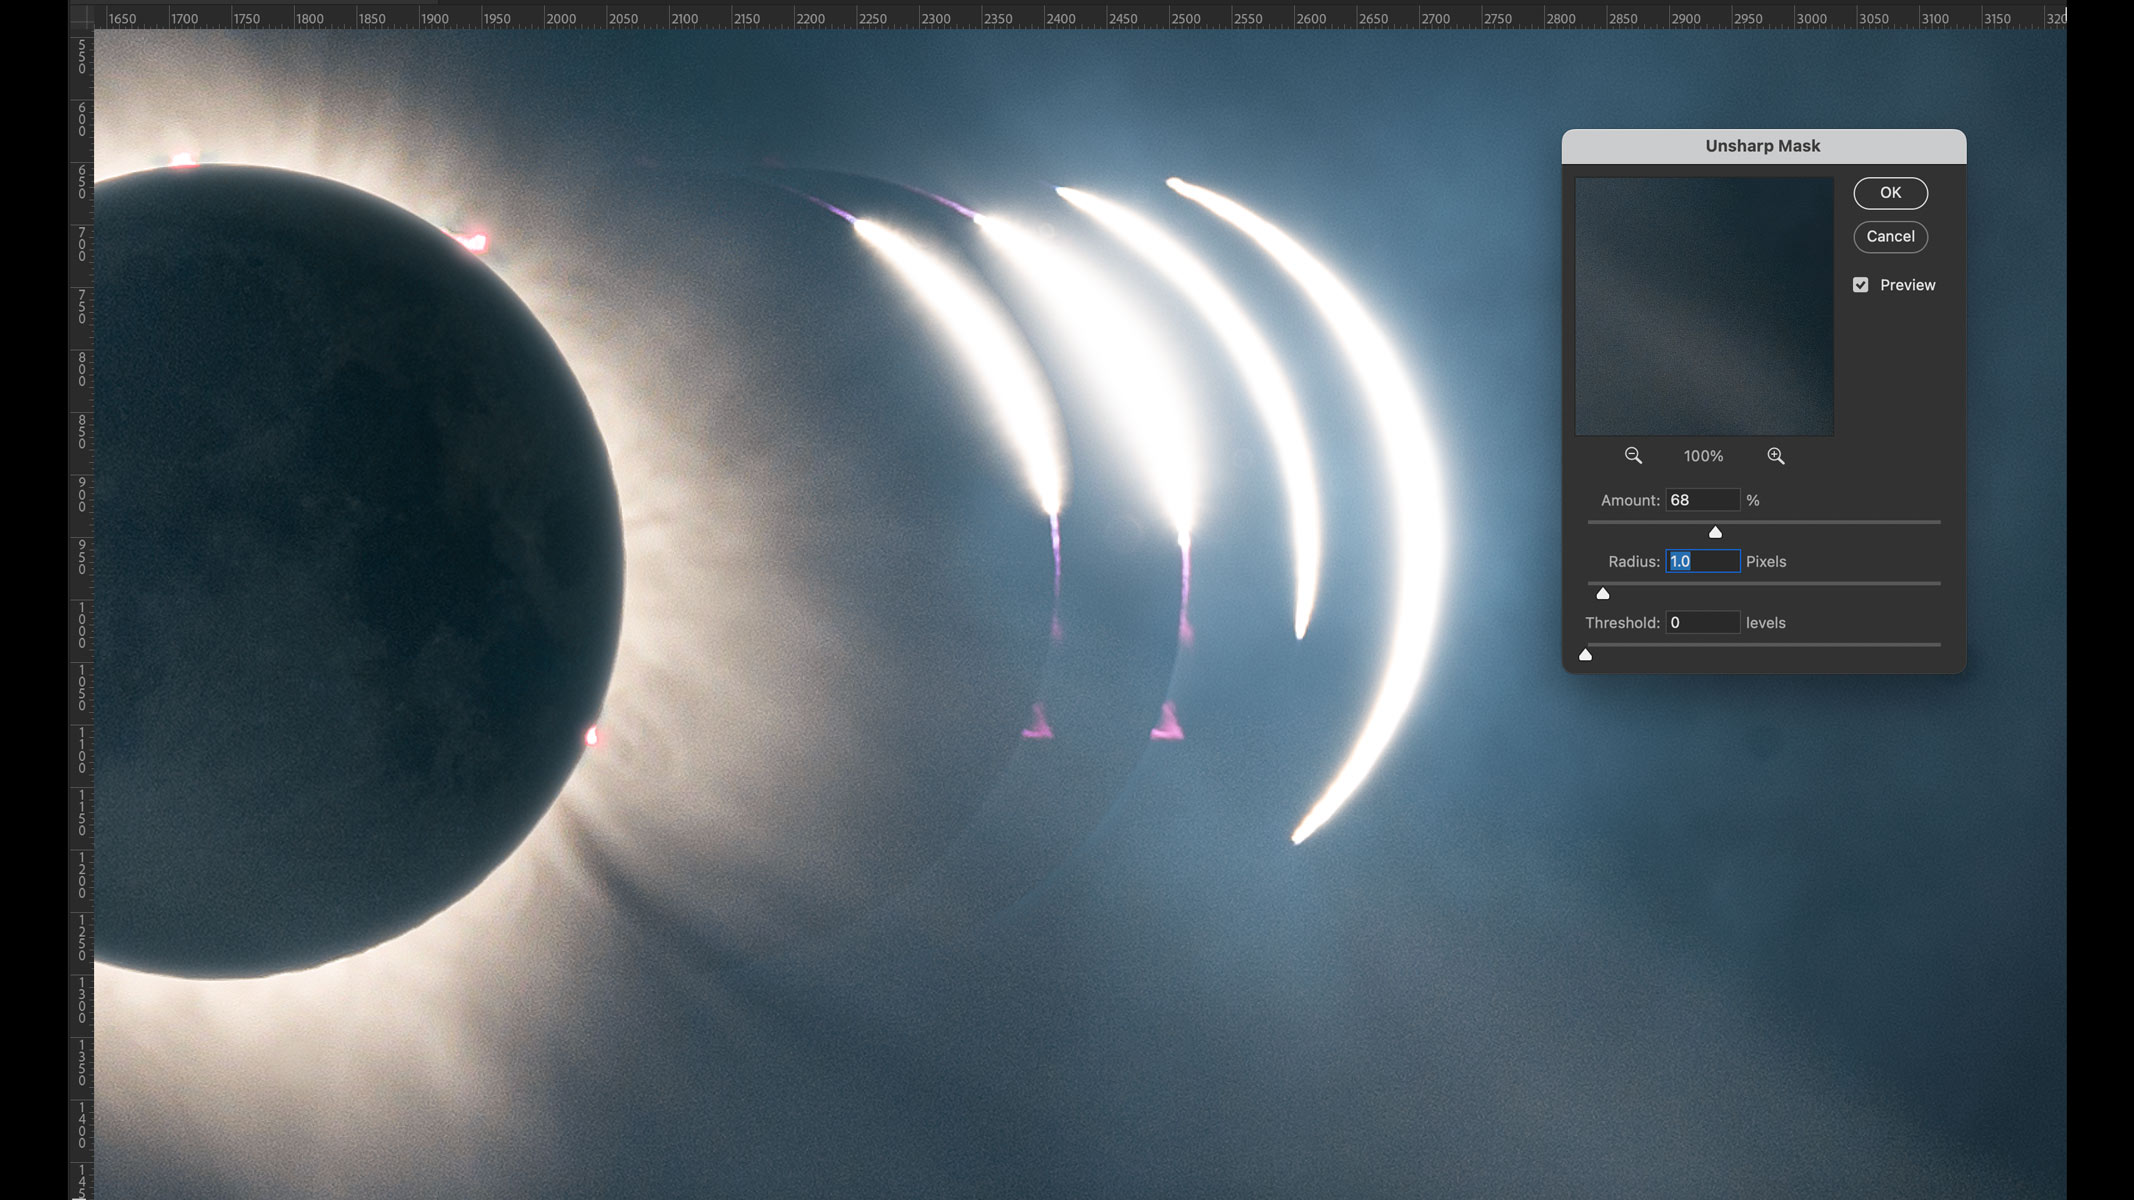
To make solar details pop, you can apply a minor sharpness adjustment to your images. Use the control-click of the sharpness adjustment tool to reveal a sharpening layer mask. (At first, the image will appear inverted, and you can control how much of the adjustment to apply.)
How to apply an artificial warmth to your images
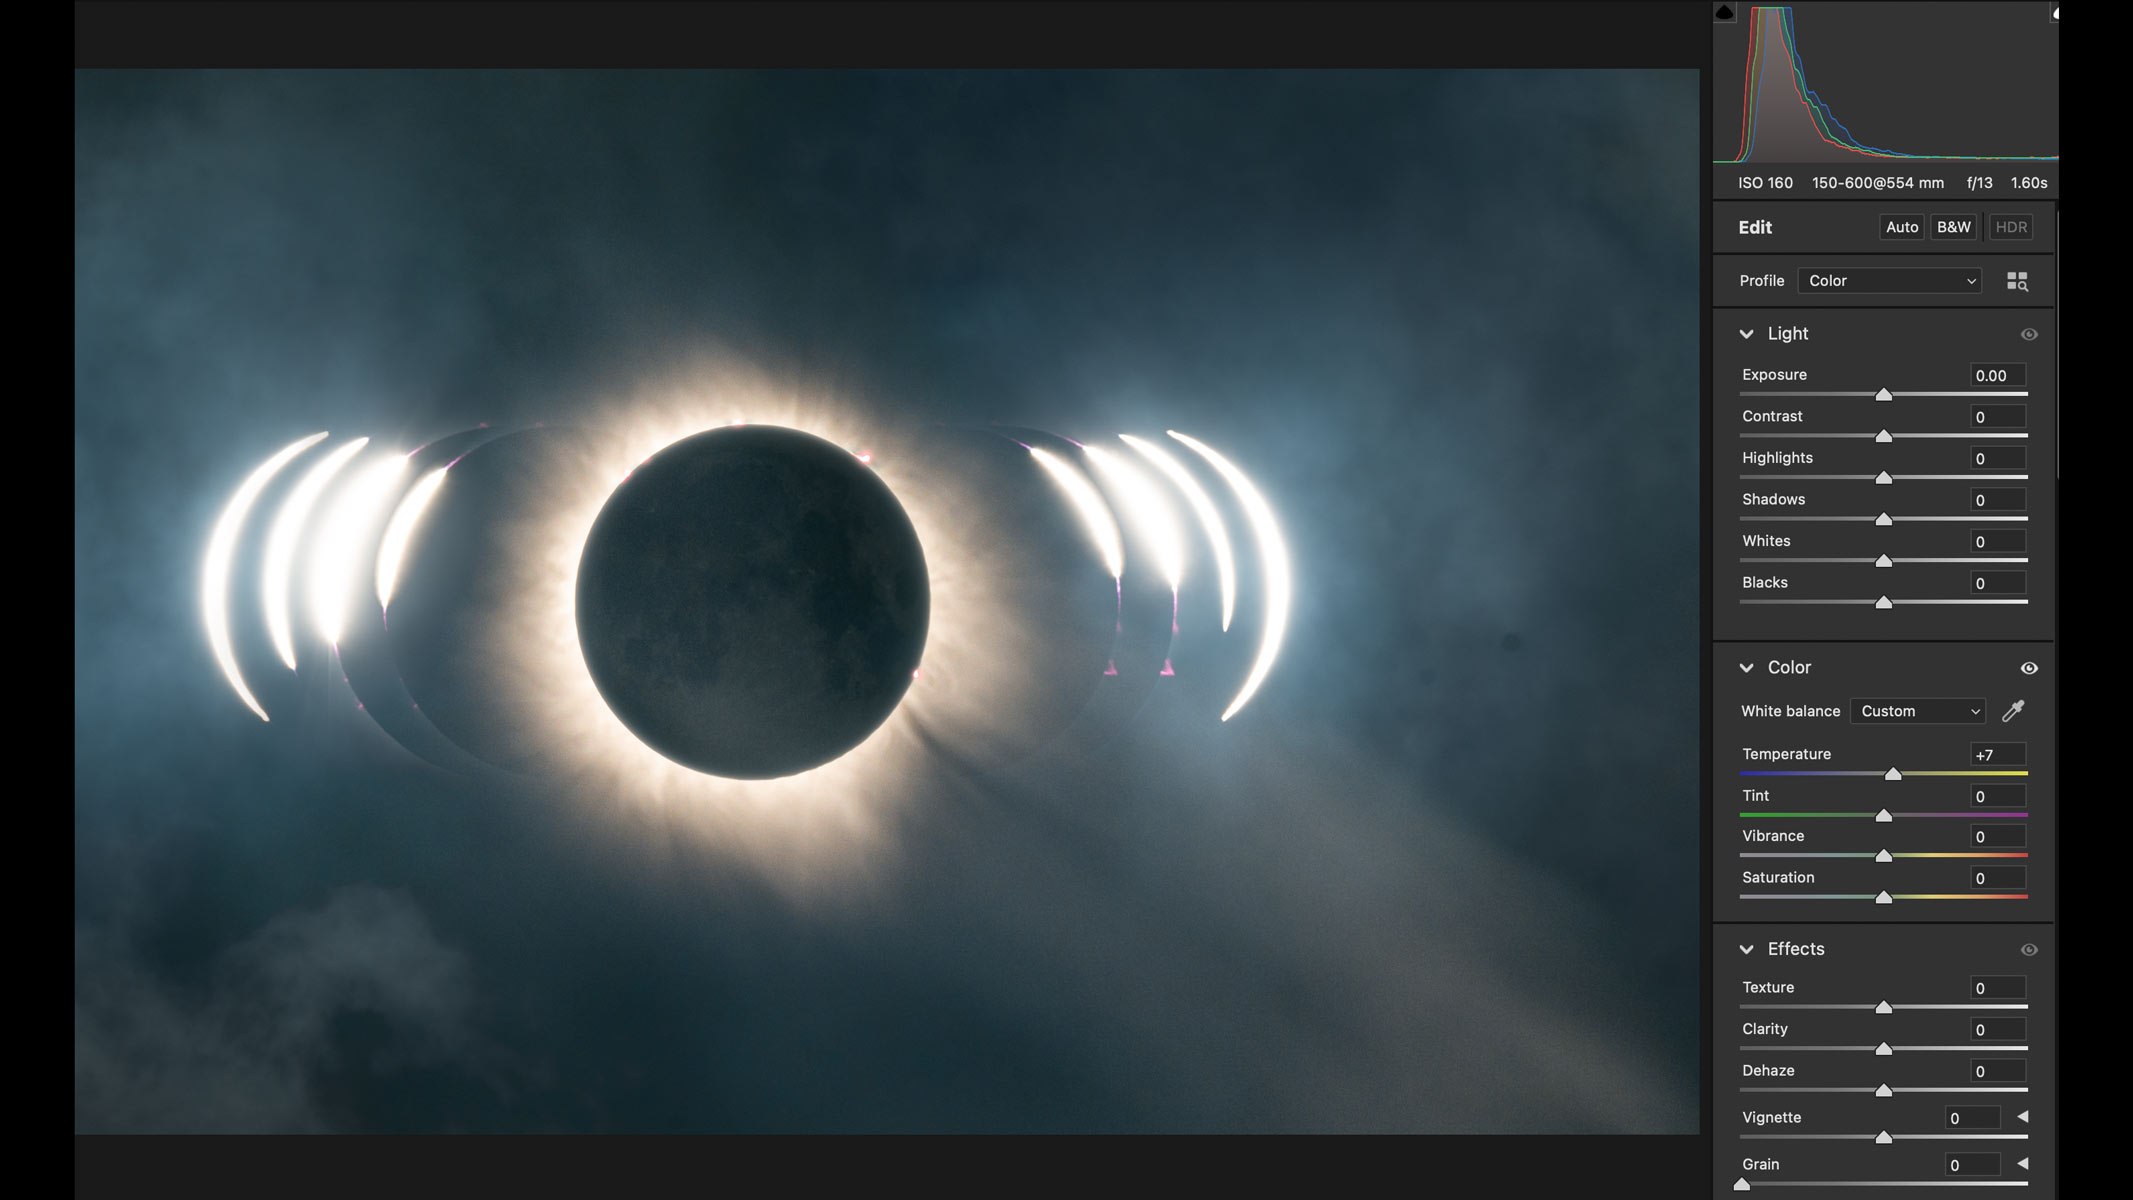
In some circumstances, astrophotographers decide to apply an "artificial warmth" to their images. When you photograph the sun using a white-light solar filter, the resulting images tend to appear neutral in color, and an artificial color (typically warmer in nature) can be used to bring out surface details and make for a more attractive visual.
To achieve this effect, increase the temperature of your image until a warm, orange tinge is visible across the solar disk.
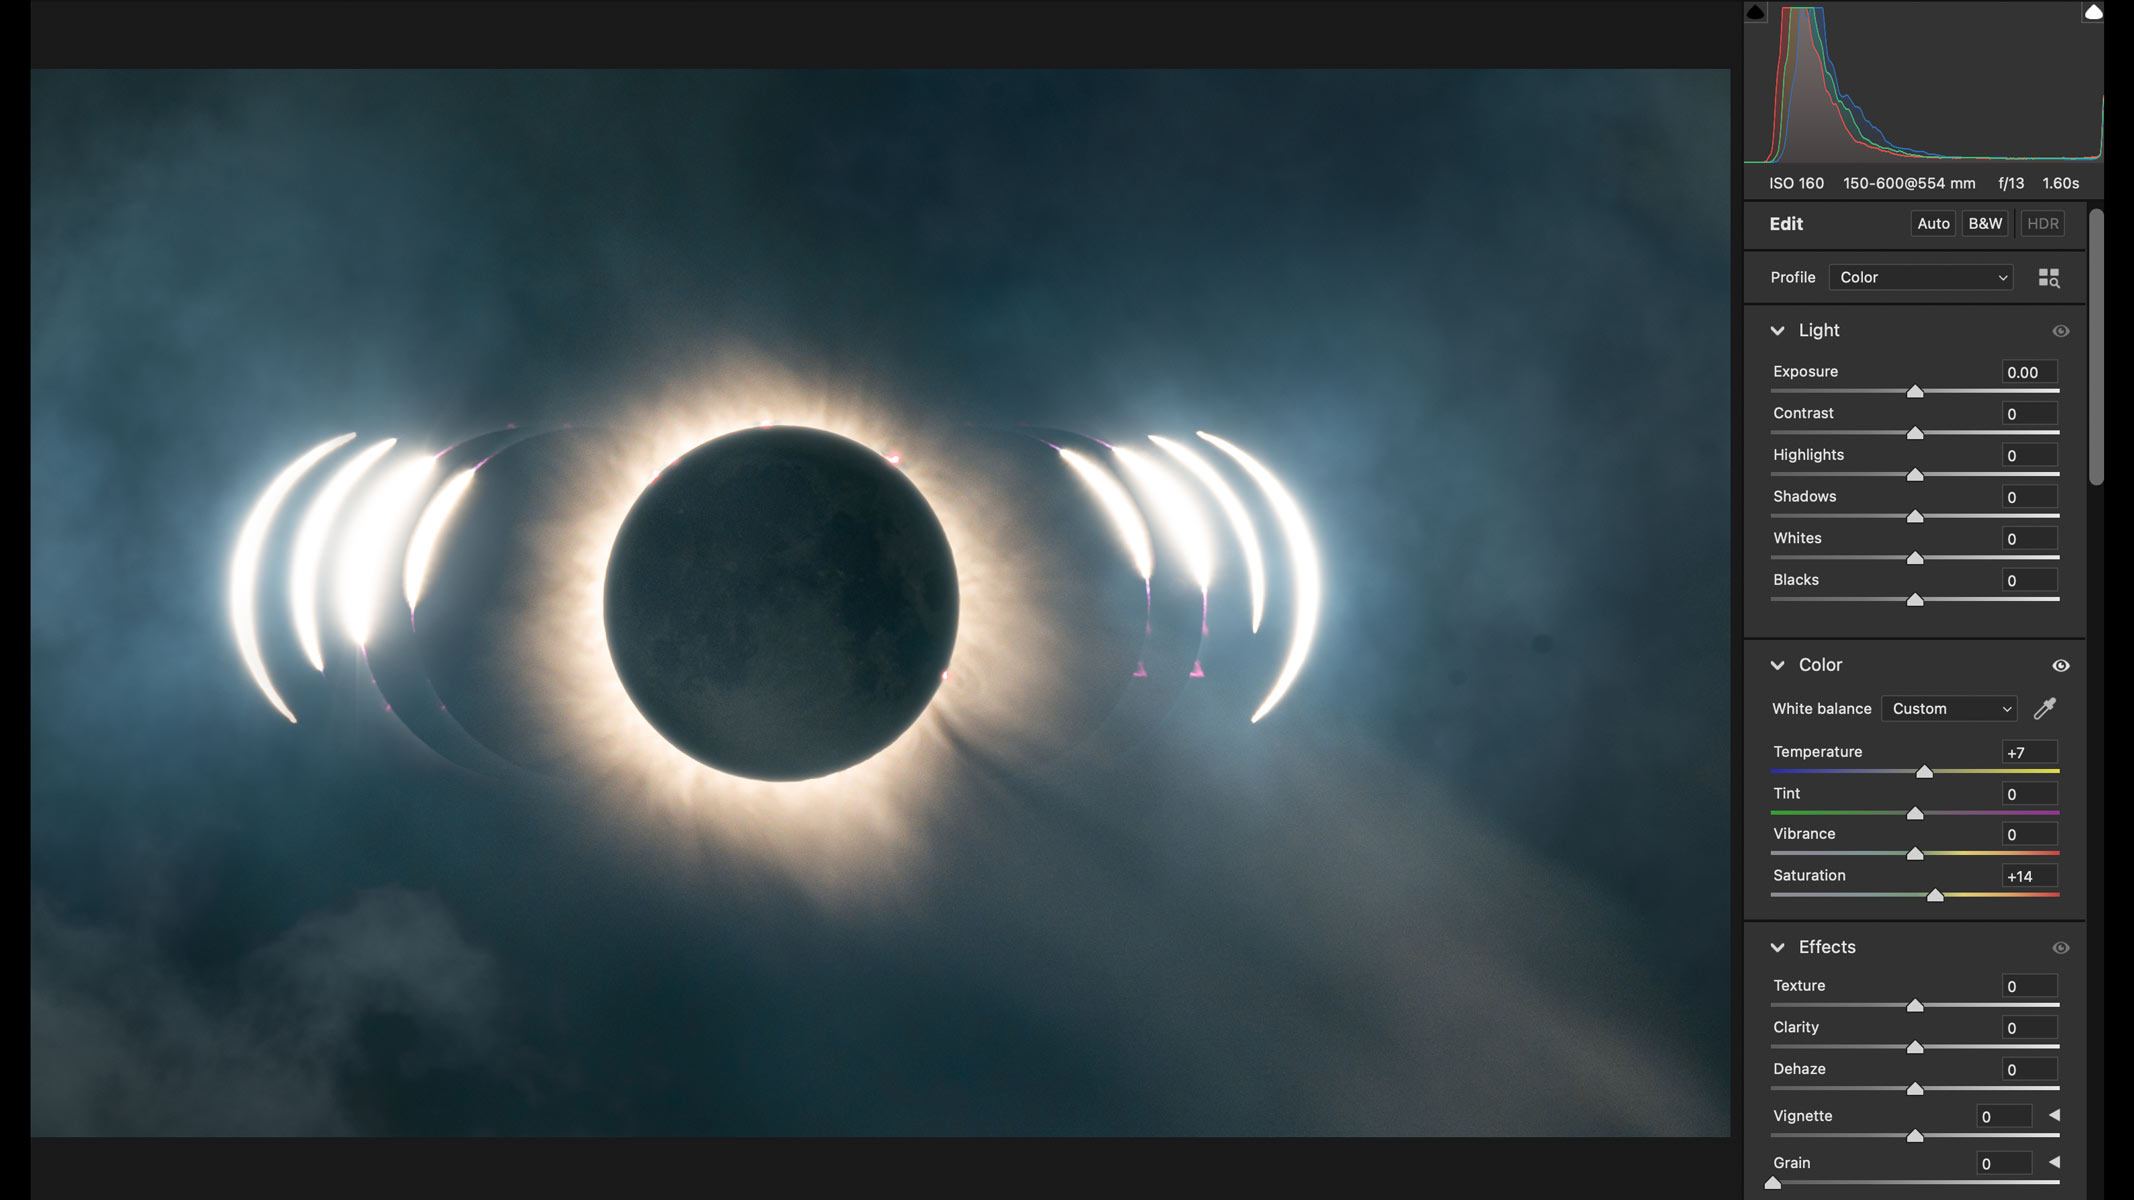
Next, apply a saturation boost, being careful not to oversaturate the image, and assess the balance between the saturation and the surface detail on the lunar disk.
How to use open layers in Photoshop
Follow these steps to edit your solar eclipse images as layers in Adobe Photoshop.
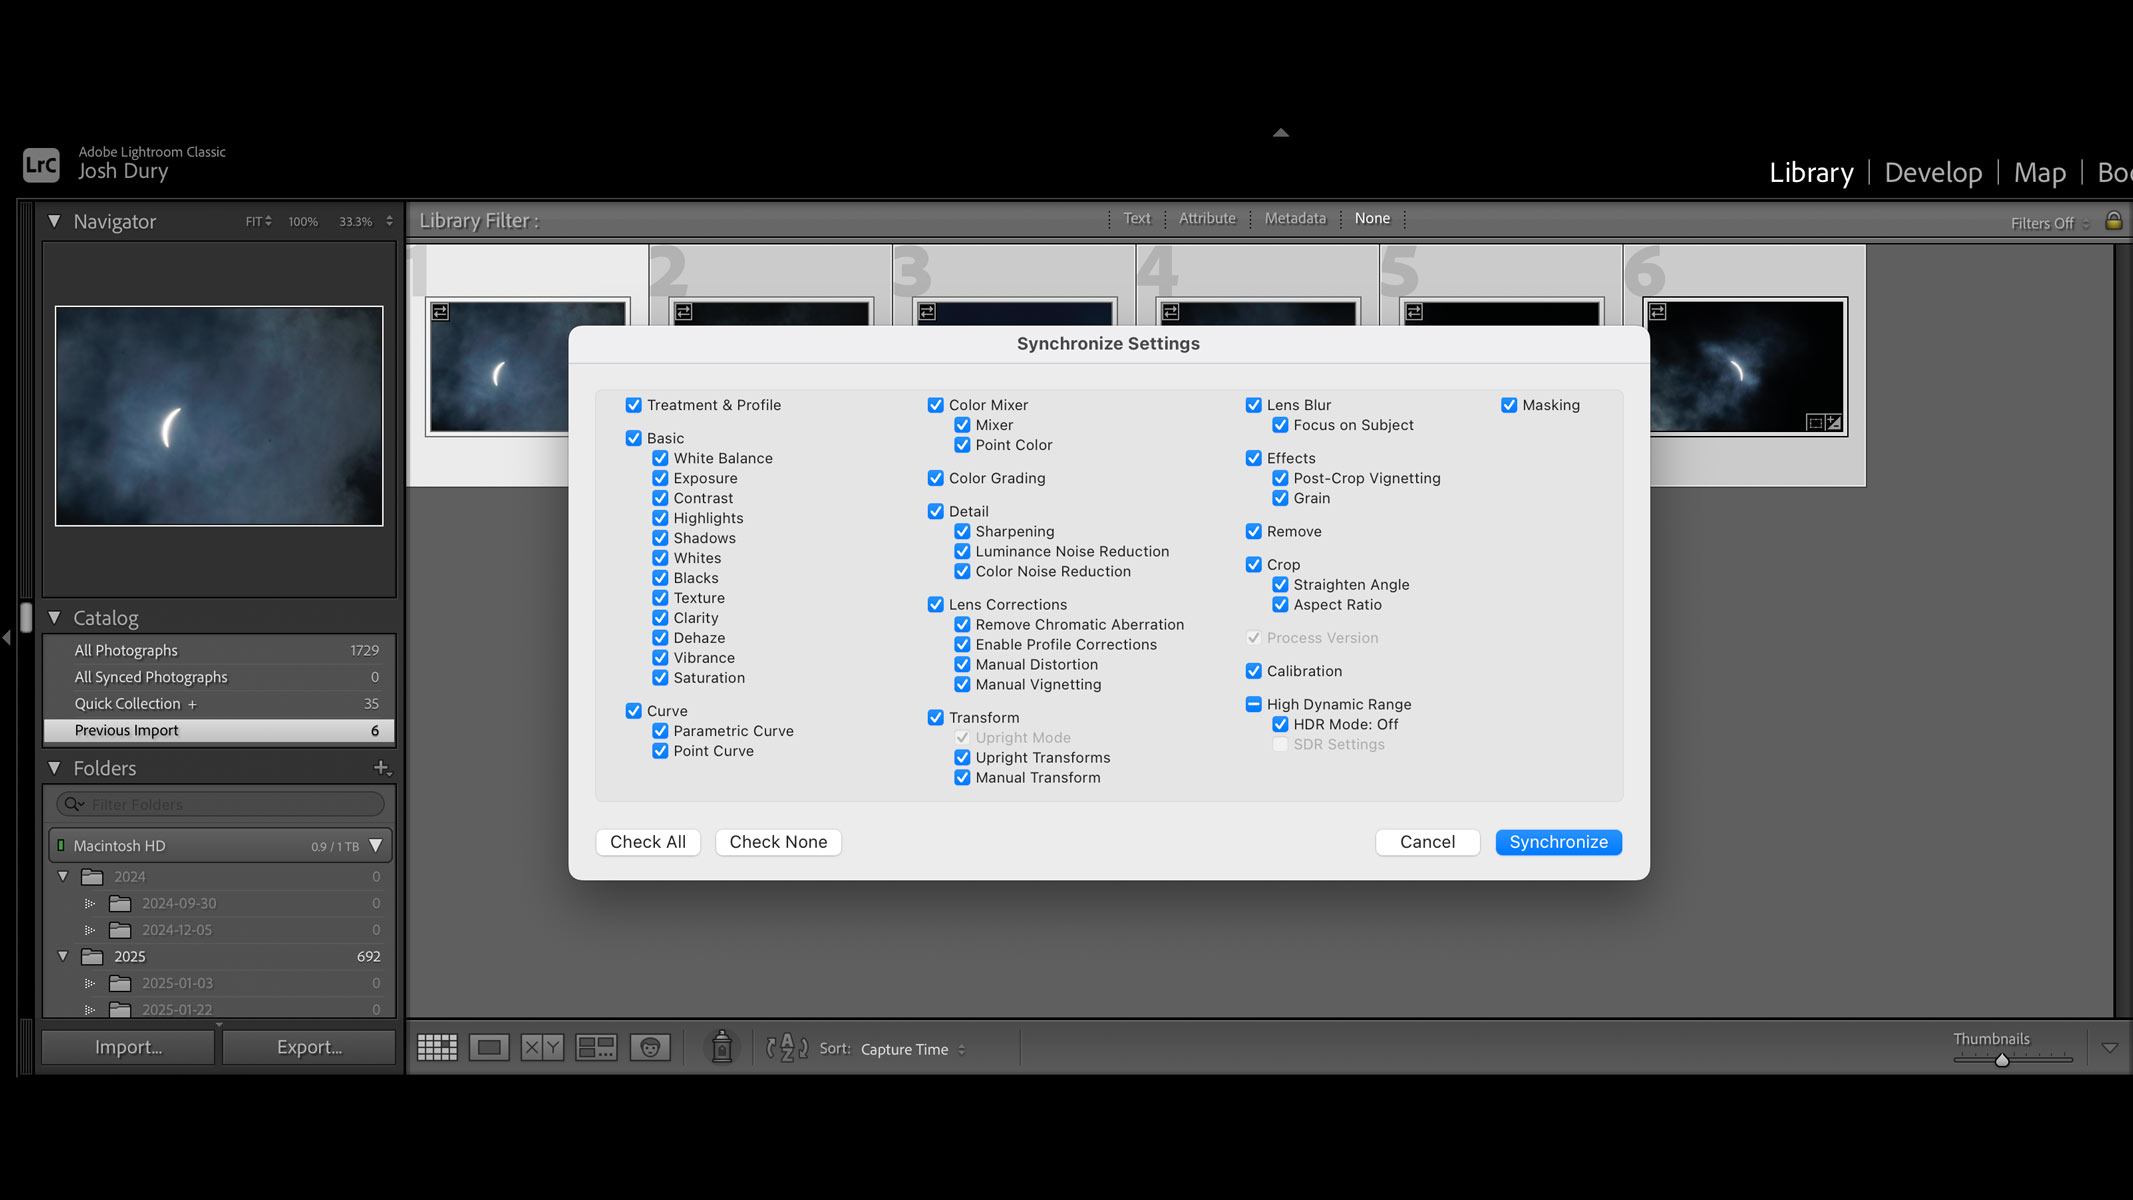
1. Select and upload your images. Choose the images you wish to incorporate. In Lightroom, choose Sync on the lower right of the screen. Select All Adjustments, and click Continue. This will copy and paste your edits across your selected images, which are now ready to be loaded into your preferred editing software. In this case, any photo editing software can be used. (At this stage, we recommend saving all of your images as TIFF files, at 16 bits to preserve resolution.) For this demonstration, we will be using Adobe Photoshop.
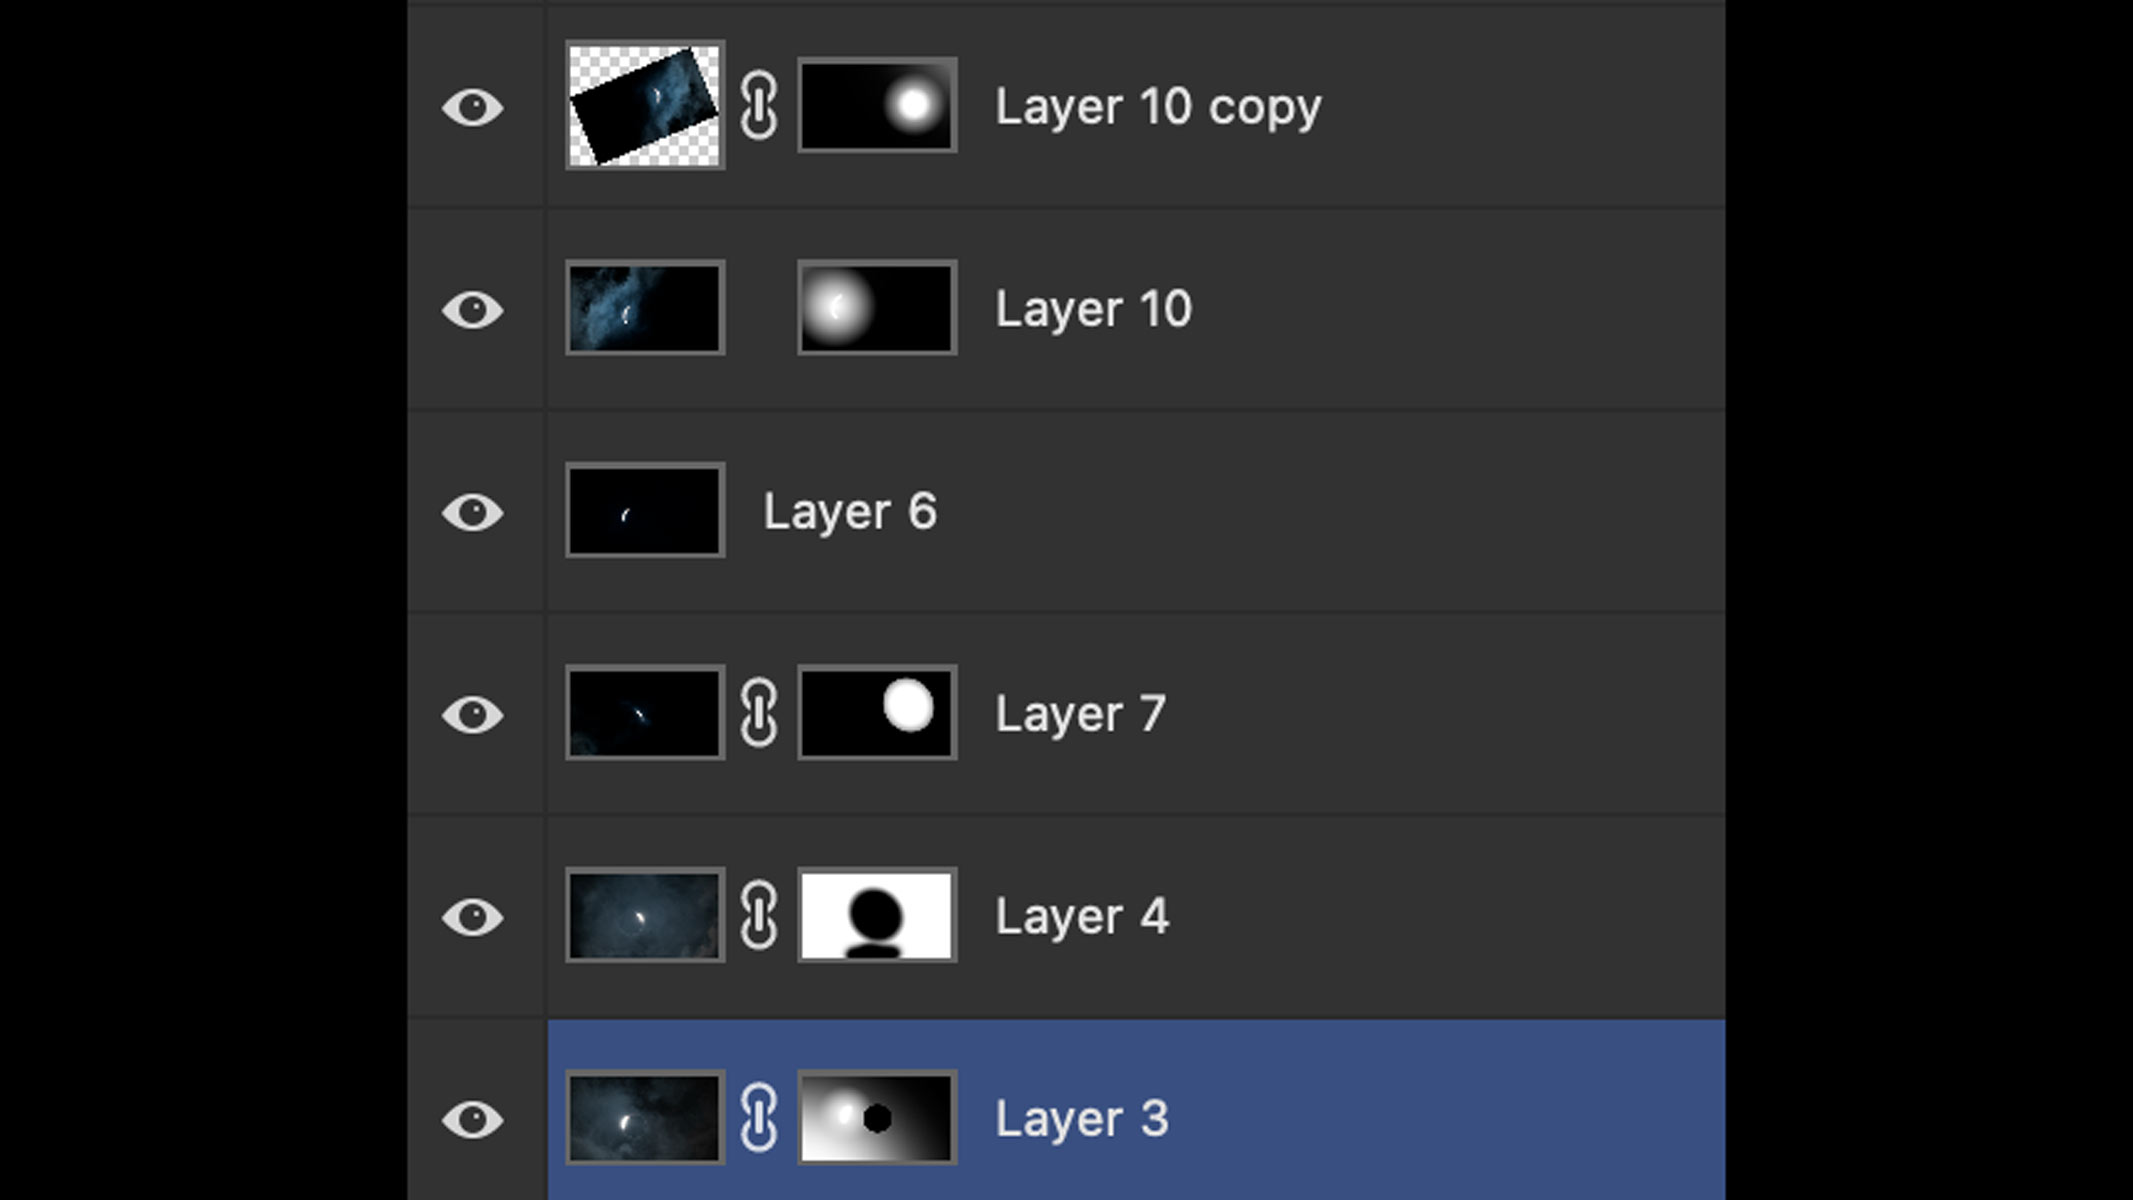
2. Open the images. Open your images as consecutive layers. This will allow you to manually adjust the position of each frame.
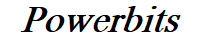
3. Find the central image. Once the layers are loaded, locate what will be your central image, capturing the peak of the eclipse — totality, annularity or the point of greatest eclipse, depending on the type of eclipse.
4. Get creative. Work the composition frame by frame. Use the ruler tools to aid your composition and mark the spacing between the images. This is where your creativity comes in. You can boost the image scale or blend the images as a row across the image frame. This technique provides you with a workable canvas, scaled to the size of your image files, and thus will preserve the resolution. If you opt for a greater canvas size, this can be edited under Image > Adjustments. Locate the canvas size and adjust it according to your taste.
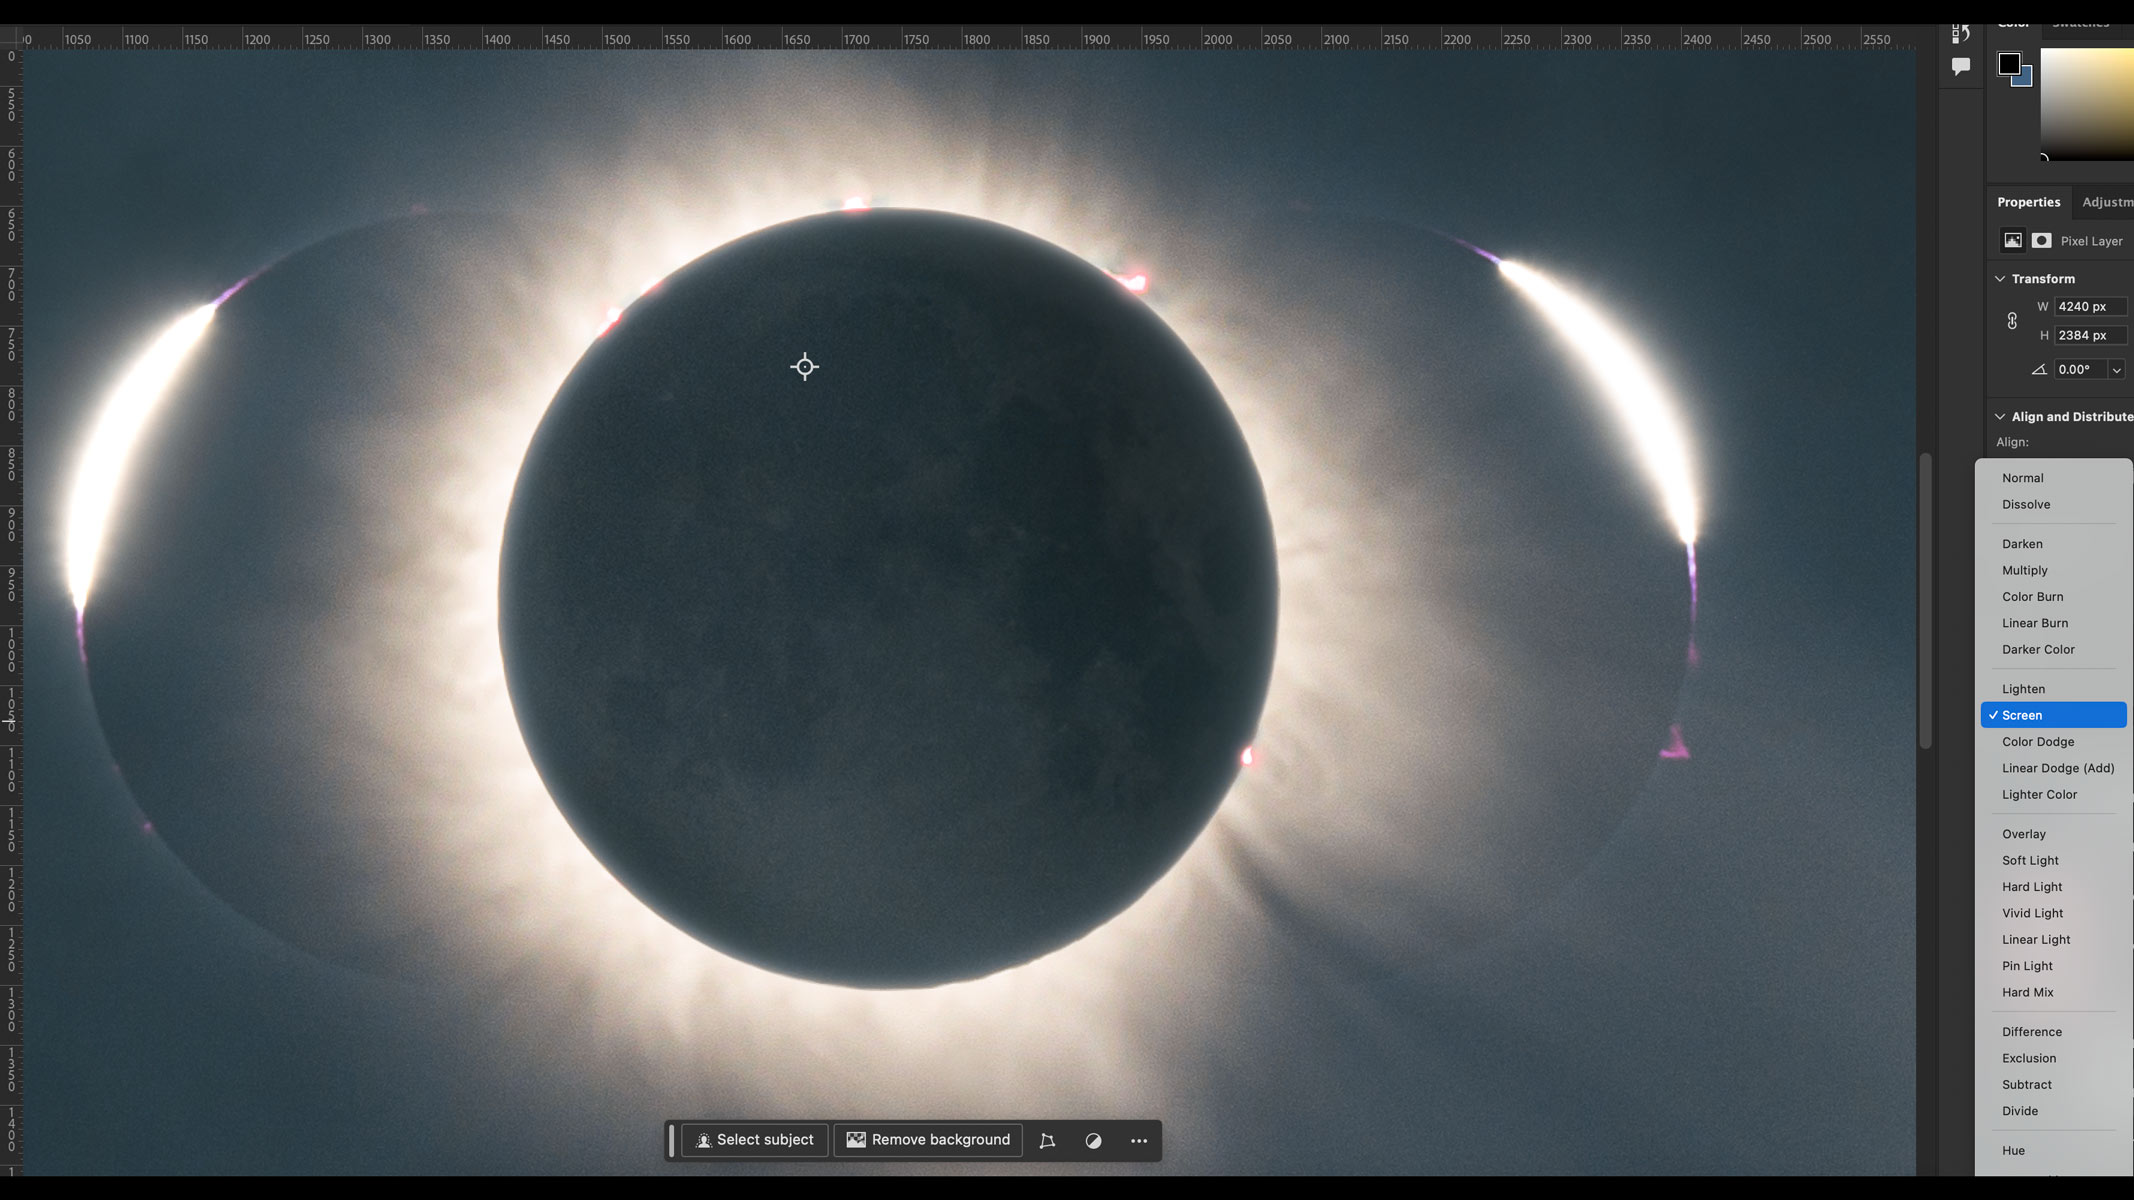
5. Change the blend mode. After you arrange your images into a composition that works for you, the next stage is to change the blend mode of each layer. Adjust the mode from Normal to Lighten. The adjacent layer will appear to interact with the layer, and you can now fine-tune your composition to reposition your images accordingly.
Experimental compositions
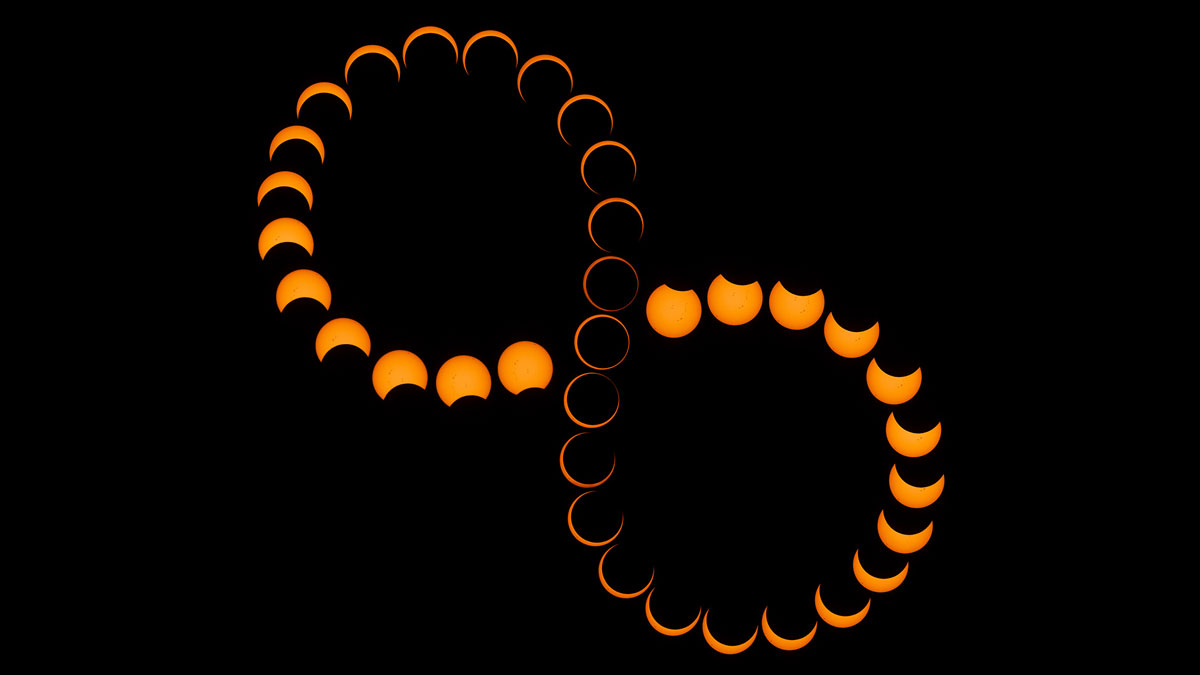
Now that you have completed your first composition, you can apply a series of other compositions. You may decide to use fewer frames from your imaging session or simply select the most dramatic images from the event. Try different compositions, such as vertical or horizontal. Or, experiment with a series of artificial shapes — such as figure eights, spirals, or circular compositions — using individual eclipse photos.
With higher-resolution images, it is possible to retain the resolution when you increase the image scale. The rule of thumb is not to exceed an image scale of around 1920 x 1080, as this will result in an overall degradation of your image.
Through trial and error, you will capture a striking image that will document the nature of solar eclipses from our perspective here on Earth.


 English (US) ·